Projects
A project is a container for one piece of work: a client's website, your own app, a marketing site, anything. It can hold a code repository, a live website, a task board, forms, a blog, and its own AI assistant, but none of that is required. Start small and add pieces as you need them.
What you can do
| Feature | What it does |
|---|---|
| Start a project | Name it and pick which parts it needs: code, website, planning, and so on. Everything can be changed later. |
| Project overview | One page showing the project's website, its forms, blog, task board, code, and AI chat, each with a live count. |
| Website & SEO | Link a live website to the project and see its SEO and market research together with the rest of the work. |
| Code | Attach a GitHub repository, or create a new one, and start an AI coding session against it. |
| Planning | A task board scoped to just this project. |
| AI & Automation | The project's own AI chat and any automations tied to it. |
| Gallery | Images, video, and other files generated or uploaded for this project. |
| Settings | Rename the project, change its description, or unlink a website. |
1. See your projects
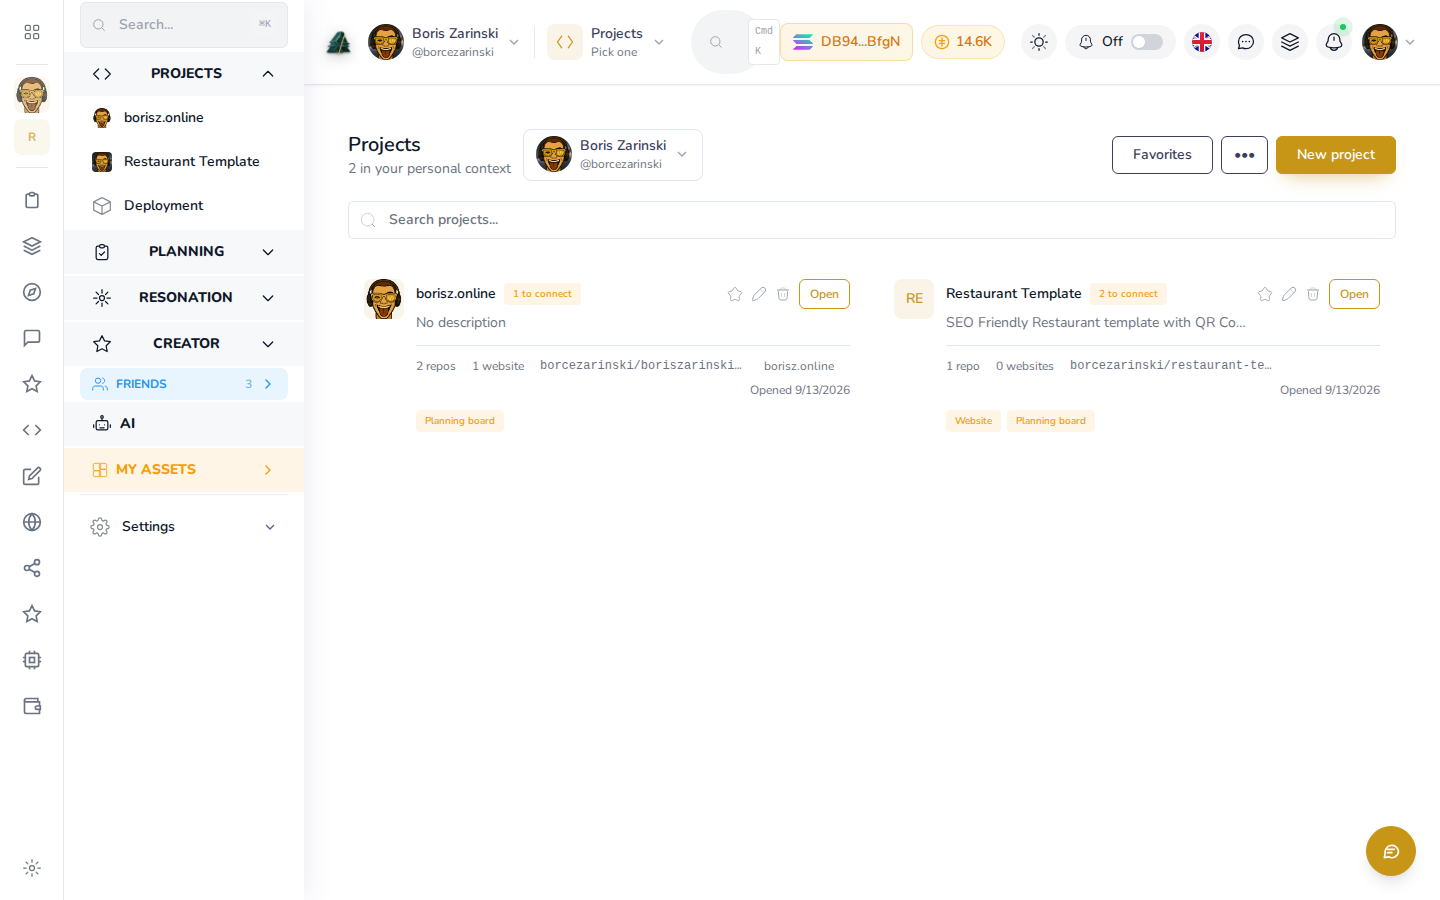
- From your dashboard, click Projects in the left menu, or open a project tile directly.
- Each project card shows what it is connected to: how many repositories, how many websites, and its planning board.
- Click Open on any project to go to its overview.
2. Start a new project
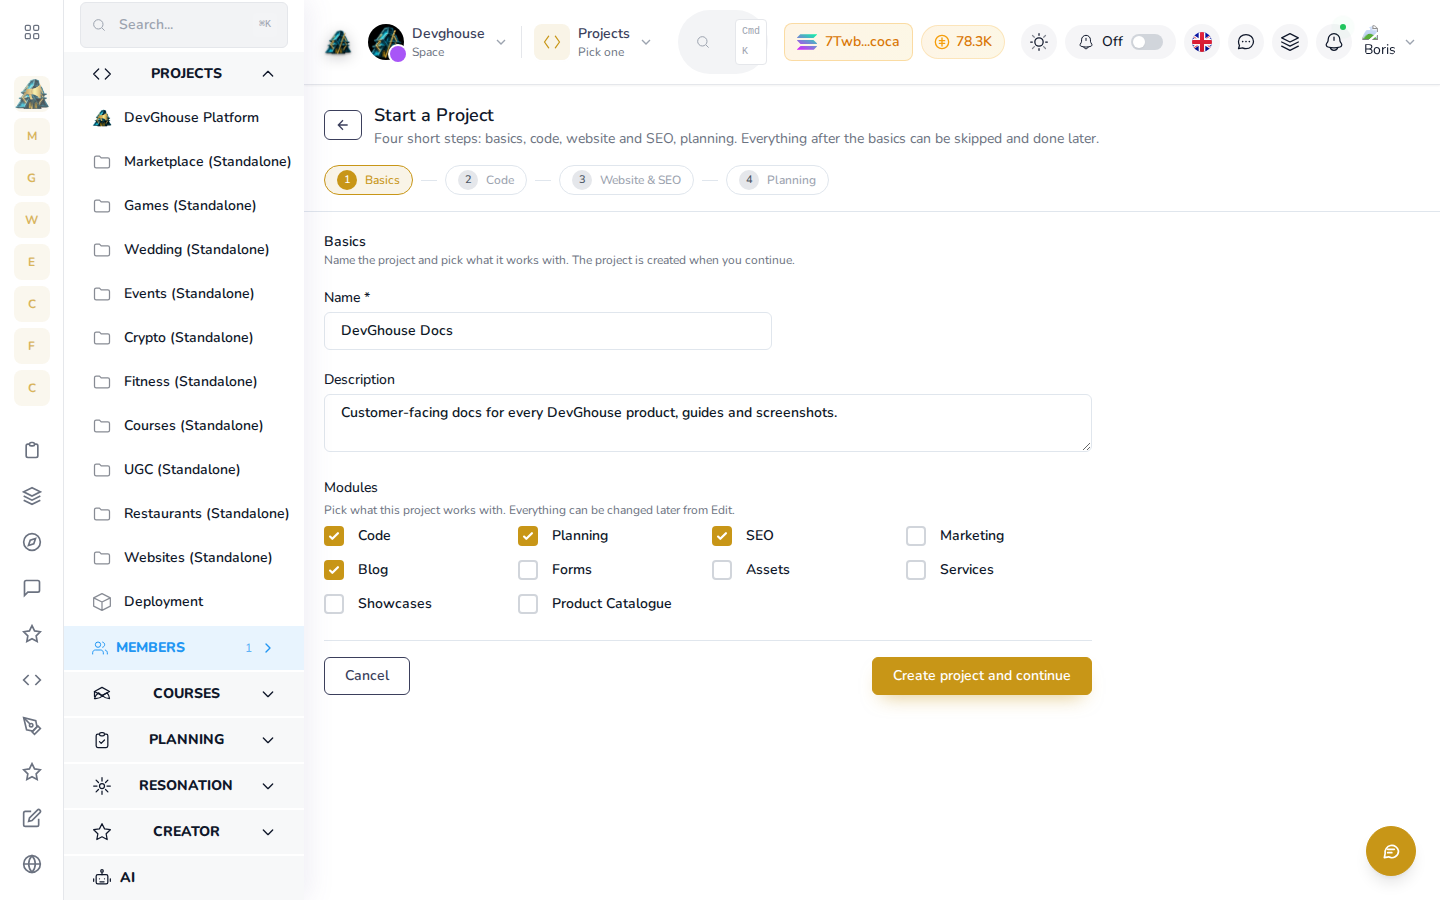
- Click New project from the dashboard or the projects list.
- On the Basics step, give it a name (for example "borisz.online") and a short description.
- Tick which modules this project uses. Code, Planning, and SEO are common ones. You can change this later, so if you are not sure, leave everything ticked.
- Click Create project and continue.
- The next steps, Code, Website & SEO, and Planning, let you connect a repository, a live site, and a task board right away. Every one of them can be skipped and set up later from the project's own menu.
3. The project overview
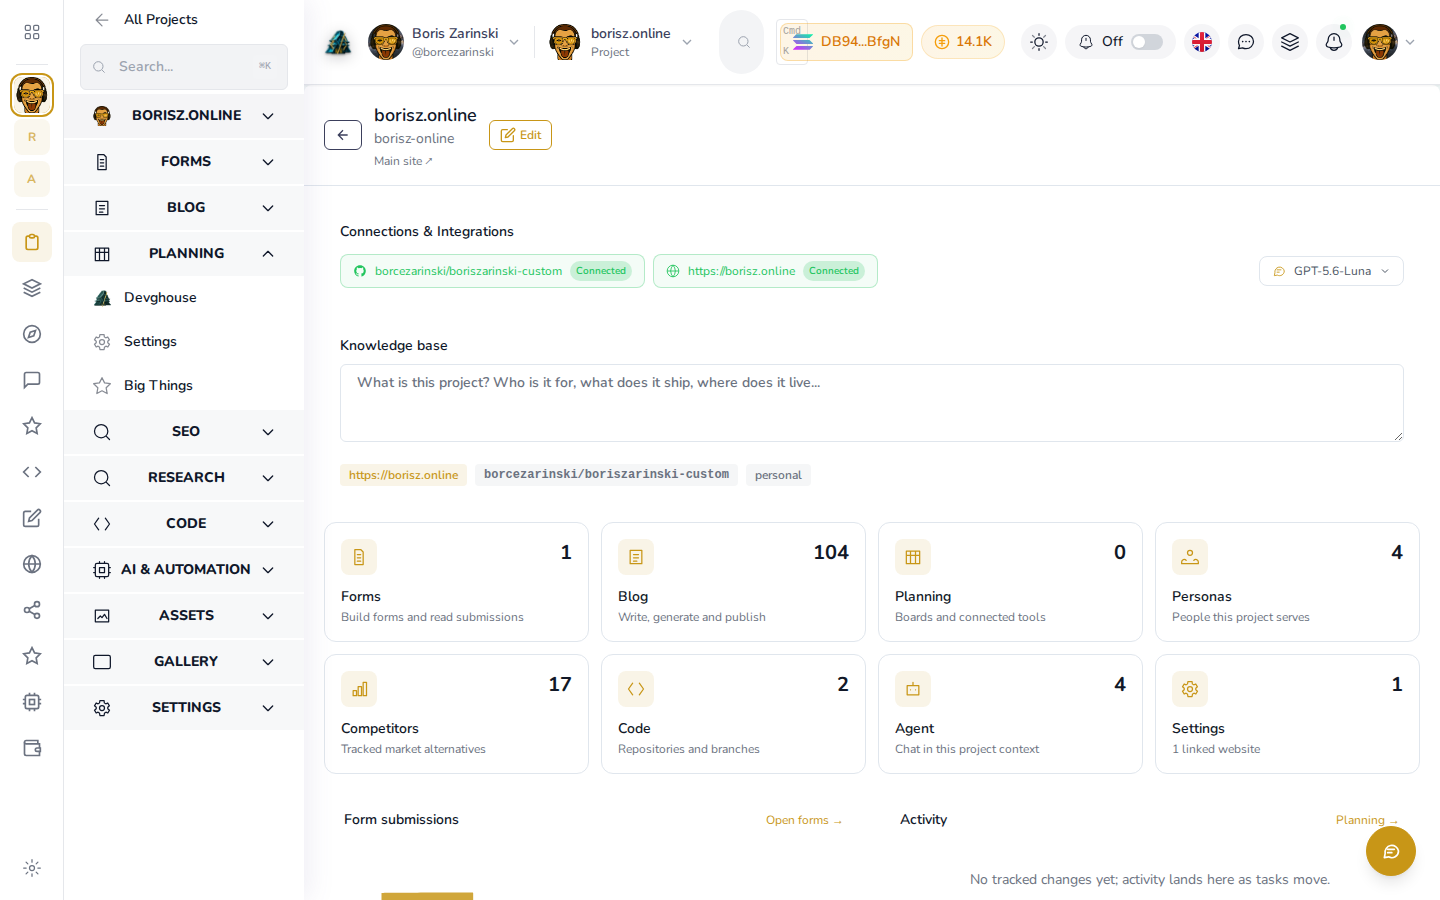
Open any project and you land here. It is a dashboard for that one project:
- Connections & integrations, at the top, shows the GitHub repository and the live website this project is linked to, and lets you pick which AI model answers this project's chat.
- Knowledge base is a free-text box. Write down what the project is, who it is for, and where it lives. Anyone, or any AI assistant, opening the project later reads this first.
- The tiles below (Forms, Blog, Planning, Personas, Competitors, Code, Agent, Settings) each show a live count and take you straight into that part of the project.
4. Work with code
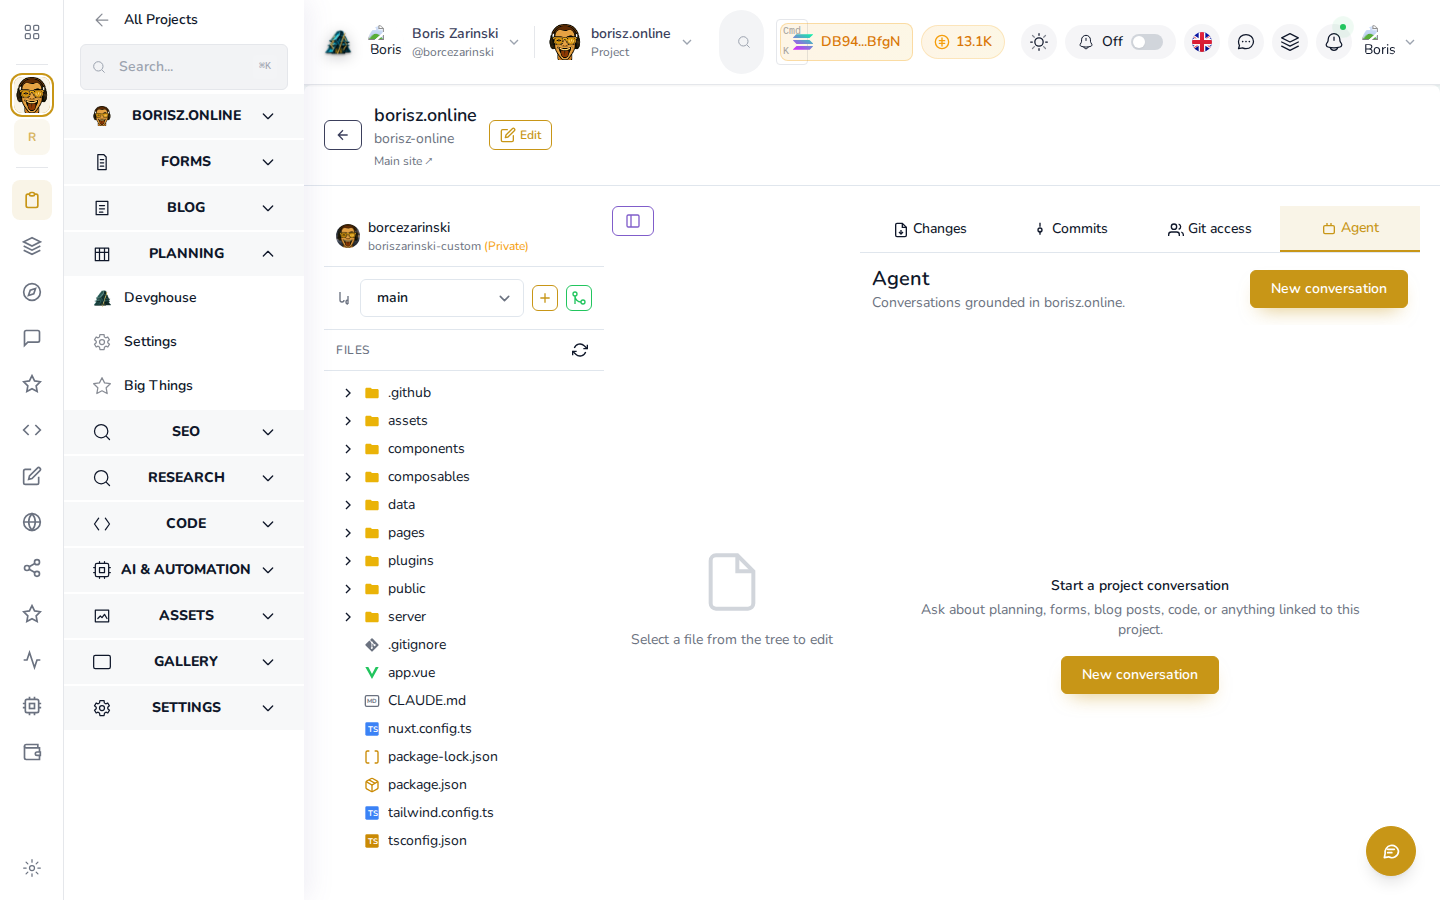
- Open a project and click Code in the left menu.
- If a coding session is already running for this project, it appears under Resume active session on the start screen, click it to jump straight back in. The screen above is that session reopened: the repository and branch in the header, every file on the left, and Changes, Commits, Git access, and Agent across the top.
- Click any file in the tree to open and edit it, or click Agent, then New conversation to describe the change you want in plain English and let it edit the real files in that repository.
- No active session yet? Create a new repository by naming it and clicking Create Repository, or pick an existing one from Select a repository.
5. Plan the work
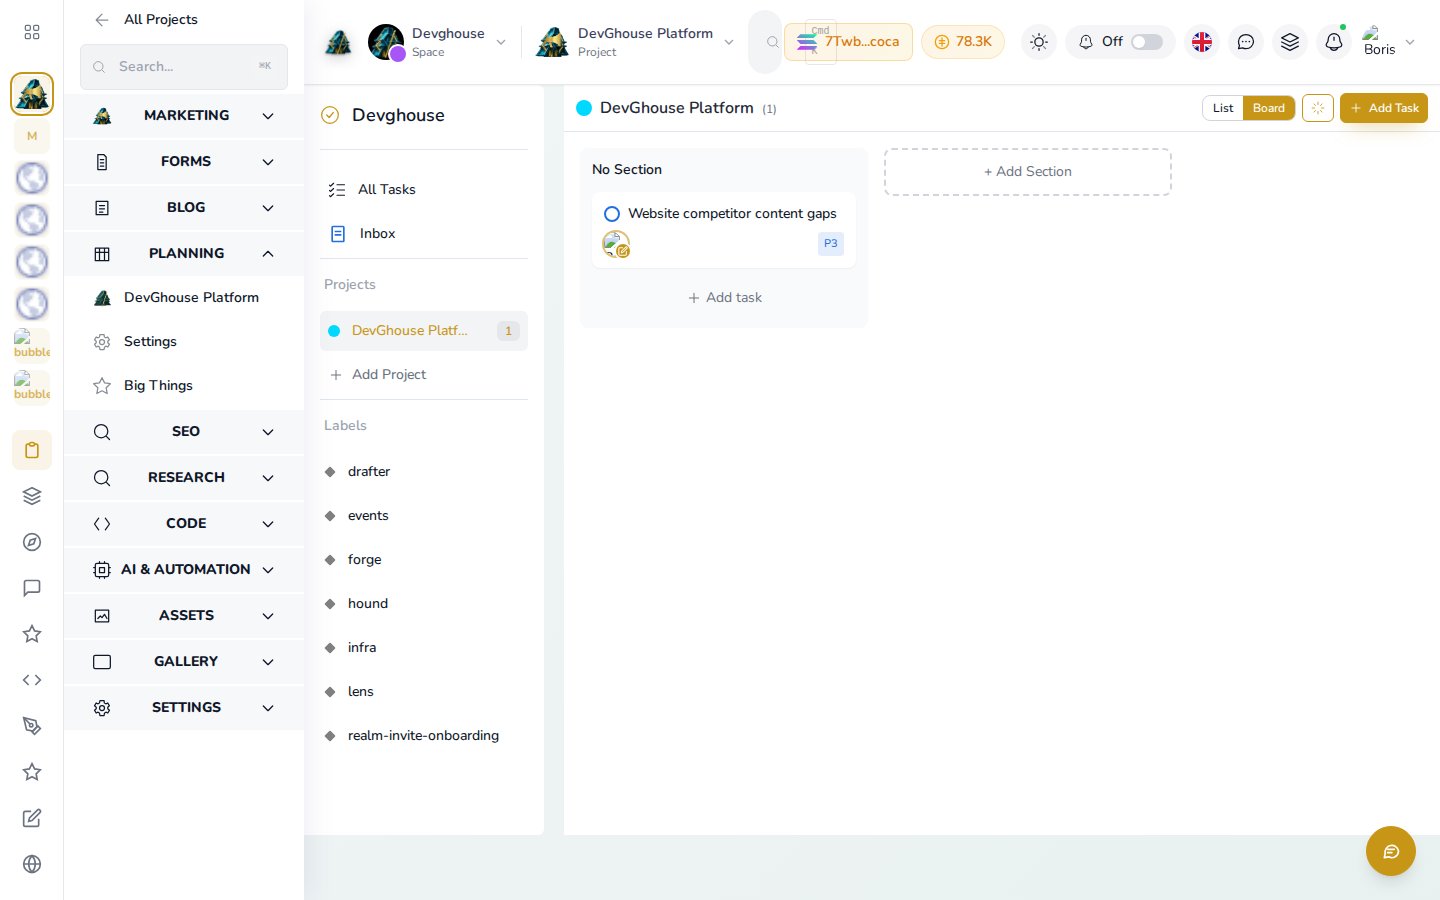
- Open a project and click Planning in the left menu. The list shows every provider (DevGhouse's own built-in board, Todoist, Trello, Notion) and which ones are already connected, plus the boards already linked to this project underneath.
- To connect a new provider, click Connect (or Link to project for the built-in board) and follow its sign-in prompt.
- Click Open on any linked board, like the screen above, to switch into it. List and Board at the top right change the view; Add Section and Add Task add to it directly, scoped to this project only.
- A teammate can also request access to a board you already connected, instead of connecting their own account. Approve or ignore the request from your notifications.
6. Link a website
Open a project's Website section to connect one of your DevGhouse website tokens (any product frontend you own, such as a Marketplace storefront or a custom site). Once linked, the project's SEO, research, and forms sections all work against that live site instead of sitting empty.
Run this with an AI assistant
A connected assistant can do everything above through the same account you use. A few of the tools it has:
workspace_project_list()andworkspace_project_get(project_id)to see and open your projectsworkspace_project_create(...)for a bare project, orworkspace_project_start(...)to create one and attach a repository and a website in a single stepworkspace_project_attach_repo/workspace_project_detach_repoto manage its codeworkspace_project_link_website/workspace_project_unlink_websiteto connect a live siteworkspace_project_link_board/workspace_project_unlink_boardto connect a task boardworkspace_project_chat(project_id, message)to talk to the project's own assistant, andworkspace_project_chat_historyto read past chatsworkspace_project_deployment_target_createandworkspace_project_deployment_target_deployto wire up and trigger a real deployment
This is the coding mode in DevGhouse's AI system: a routine or chat working inside a project it is briefed on that project's repository, website, and plan before it makes its first move, so it never guesses which site it is working on.