
Workspaces and teams
DevGhouse calls a shared team space a workspace (internally, a "realm"). Your personal account is always there; a workspace is an optional extra one you create for a business or a team, with its own credits, its own members, and its own projects, separate from your personal ones.
What you can do
| Feature | What it does |
|---|---|
| Switch context | Move between your personal account and any workspace you belong to, from one dropdown. |
| Create a workspace | Set one up for a company, agency, or group, with its own name and logo. |
| Invite members | Add people to your workspace by email. |
| Manage roles | Change what a member can do inside the workspace. |
1. Switch between your account and a workspace
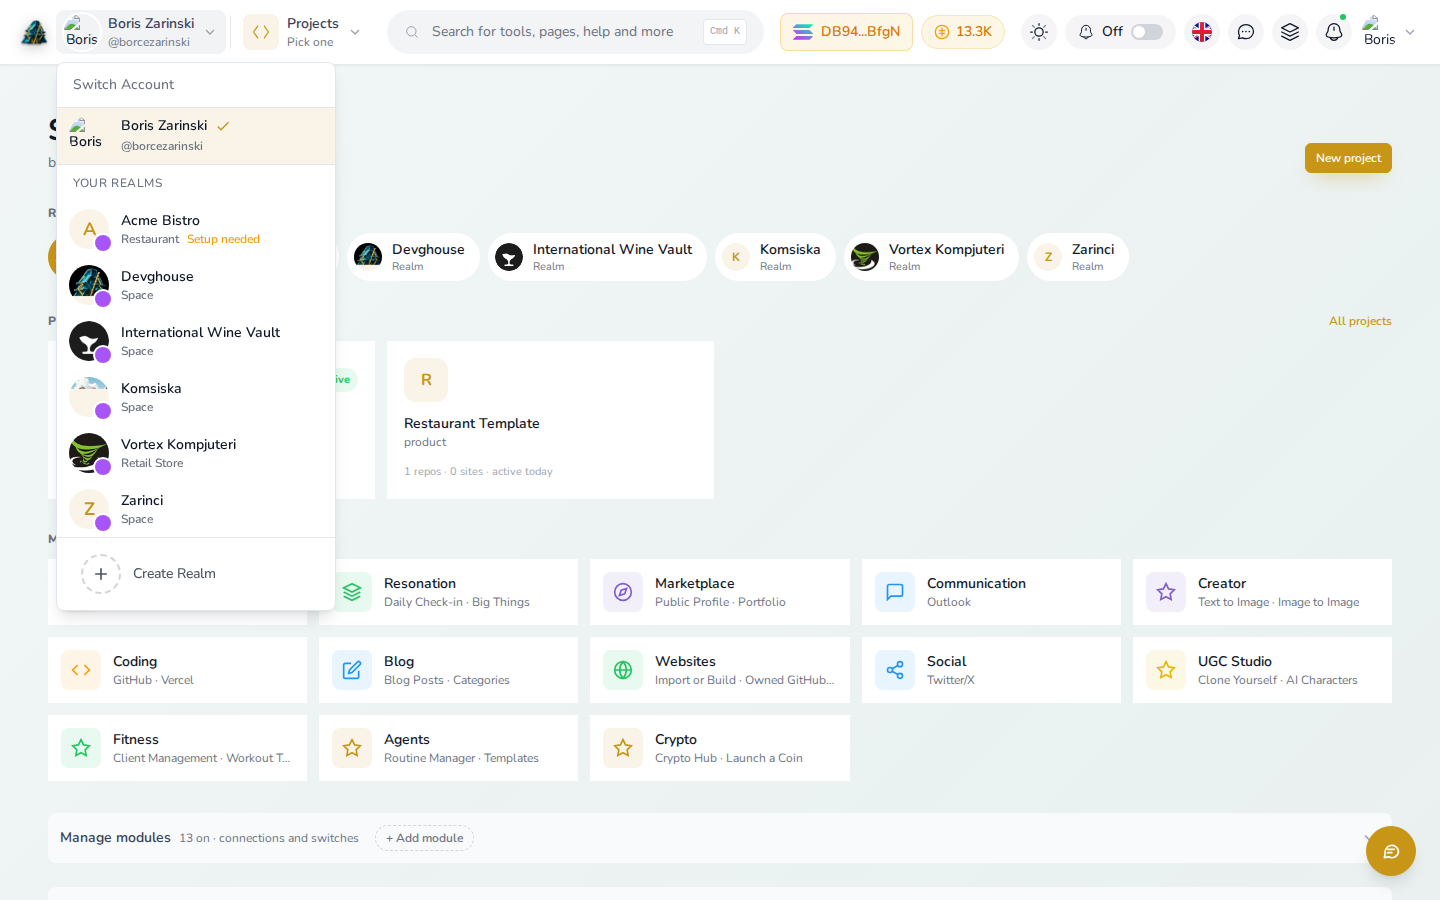
- Click your name in the top left. The Switch Account panel opens: your personal account at the top with a checkmark showing it is the one currently active, then Your Realms, every workspace you belong to, below it.
- Click any workspace in the list to switch into it. Its own projects, credits, and files replace what you were looking at, and a brief "Switching to..." loader shows over the page while it moves you in.
- Everything you do (creating a project, spending credits, generating an image) happens inside whichever workspace is currently selected. Always check the name in the top left before you start work that costs credits.
2. Create a workspace
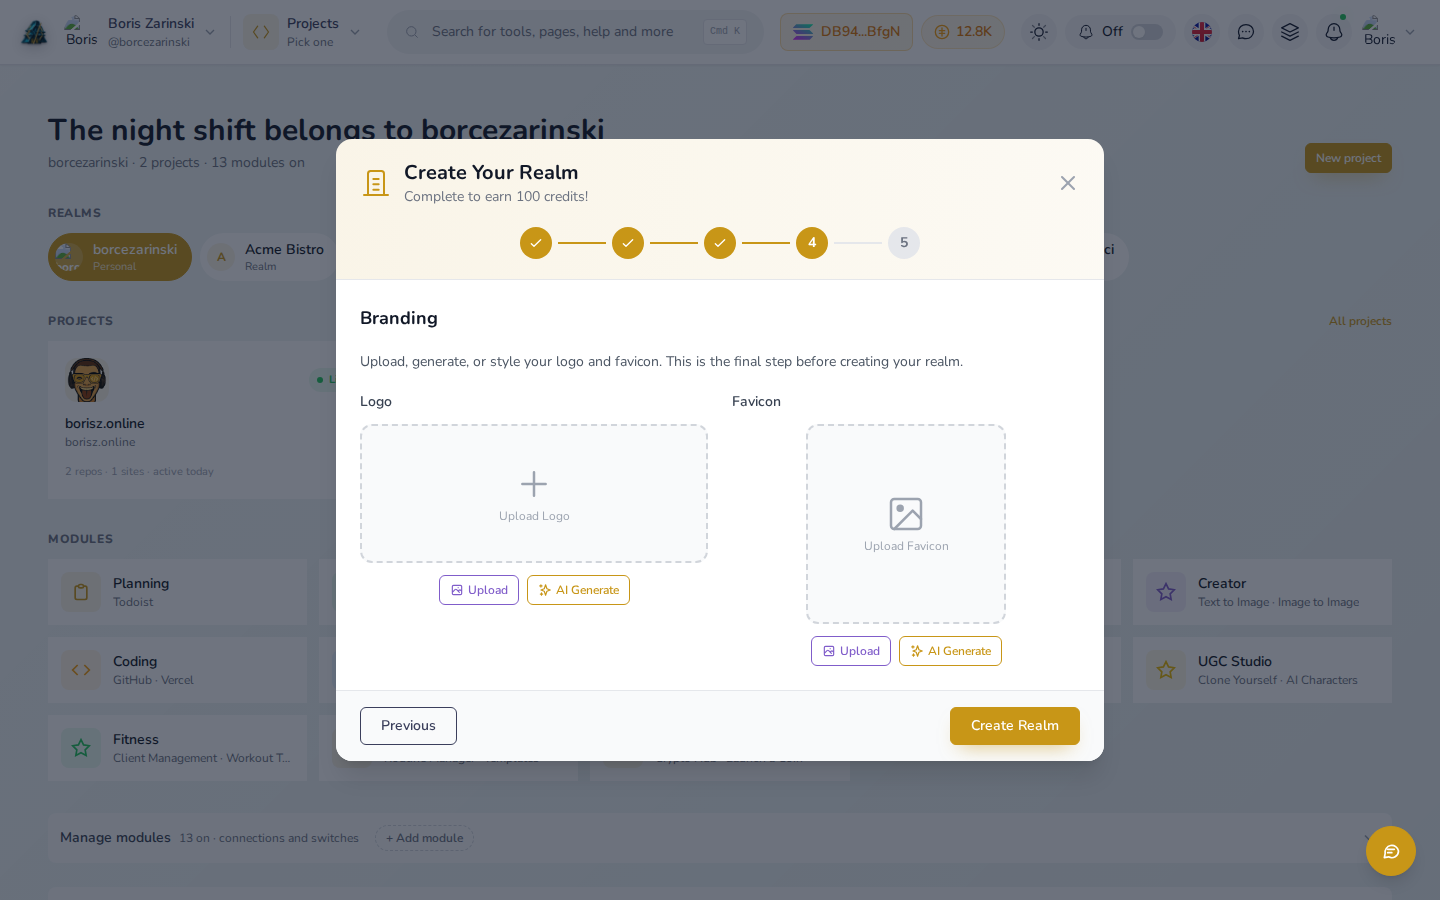
- From the workspace switcher, choose Create Realm.
- Step 1, Basic Information: pick what type of realm it is (General, Retail Store, Online Business), then its name, tagline, and description.
- Step 2, Location & Contact and Step 3, Social Links are both optional, fill in an email, a website, or any social profiles worth attaching.
- Step 4, Branding, shown above, uploads or AI-generates a logo and favicon, also optional. Click Create Realm once every step you want is filled in.
- Finishing the setup earns you 100 credits in the new workspace.
3. Invite people
- Switch into the workspace you want to invite someone to.
- Open its members settings and click Invite member, then enter their email.
- They receive an invite; once accepted, they can switch into the workspace the same way you do.
- From the same screen you can change a member's role, or remove them.
Run this with an AI assistant
These are always-on tools, available in every context, since they cover the account layer itself:
realm_list_all()lists every workspace you belong torealm_create(...)sets one uprealm_get_info(realm_id)andrealm_update(...)read and edit onerealm_get_members(realm_id),realm_invite_member(...),realm_update_member_role(...),realm_remove_member(...)manage who is in it
Every MCP call that names a realm_id runs in that workspace's context: its data, its credits, its modules. Leaving realm_id out always means your personal account, never whichever workspace you last looked at, so a script or an assistant should always be explicit about which one it is acting on.