
Setting up an automation
An automation, also called a routine, is a saved job that runs on its own. Unlike a chat, nobody has to type the request each time it runs, it fires on a schedule you set, when an outside system calls its webhook, or when a form on your site is submitted.
What you can do
| Feature | What it does |
|---|---|
| Your automations | A list of every routine you've set up, whether it's on or off, and when it next runs. |
| New automation | Build one from a blank instruction, or a ready-made template. |
| Schedule | Run once, hourly, daily, weekly, on a fixed interval, or at a random gap each time. |
| Webhook | Get a unique URL that fires the routine when another system posts to it. |
| Form trigger | Fire the routine every time a specific form on your website receives a submission. |
1. See your automations
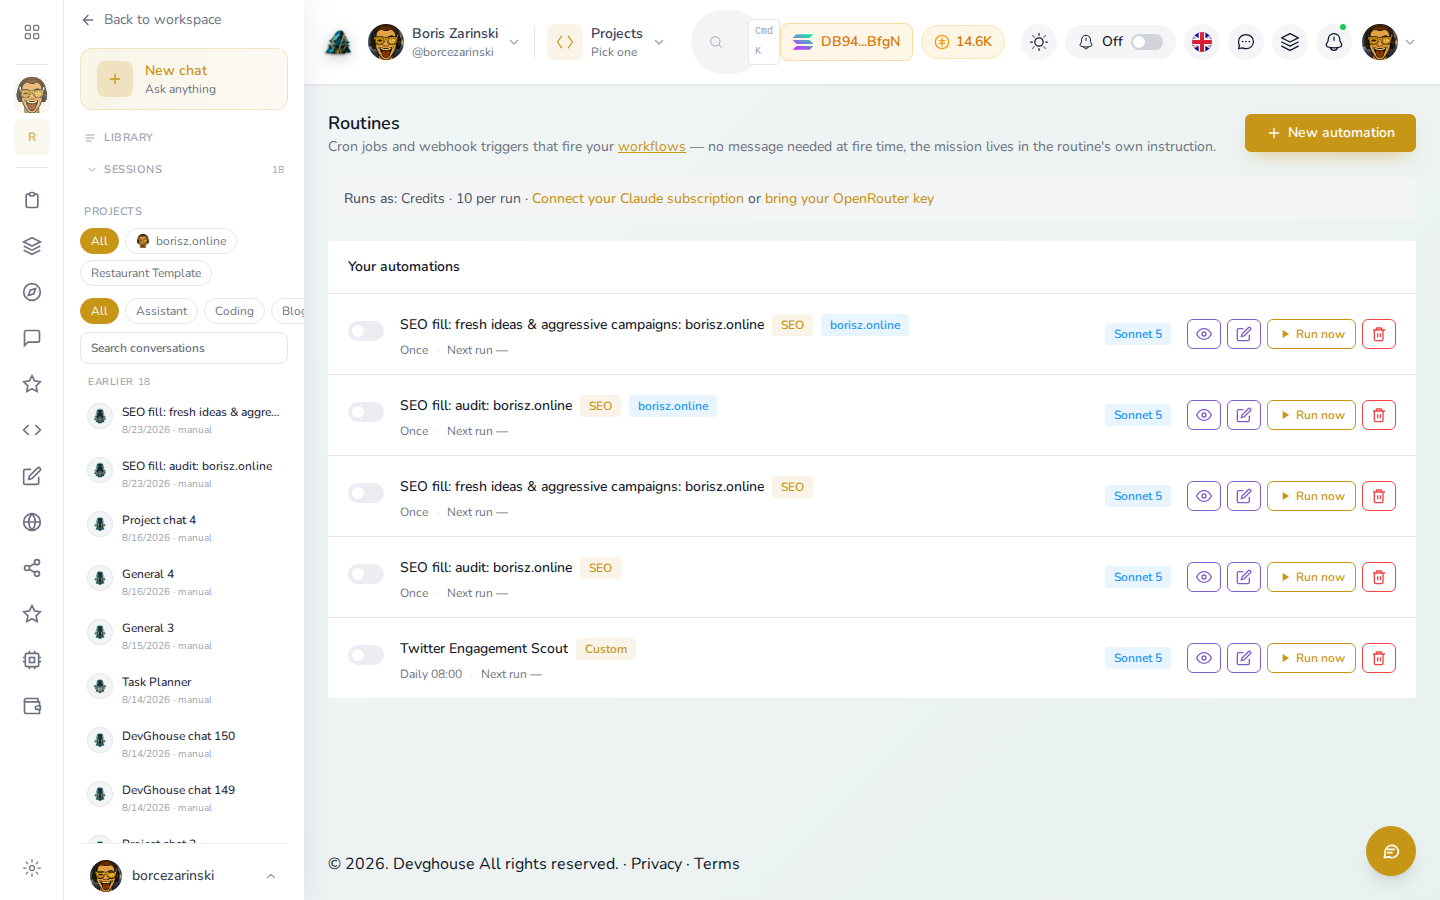
- Select Agents, then Routines in your workspace sidebar, or go straight to app.devghouse.com/routines.
- Each row shows the automation's name, what it's scoped to (a project or website, if any), which AI model it runs on, and when it next runs.
- Toggle the switch on the left to turn one on or off without deleting it.
2. Start a new automation
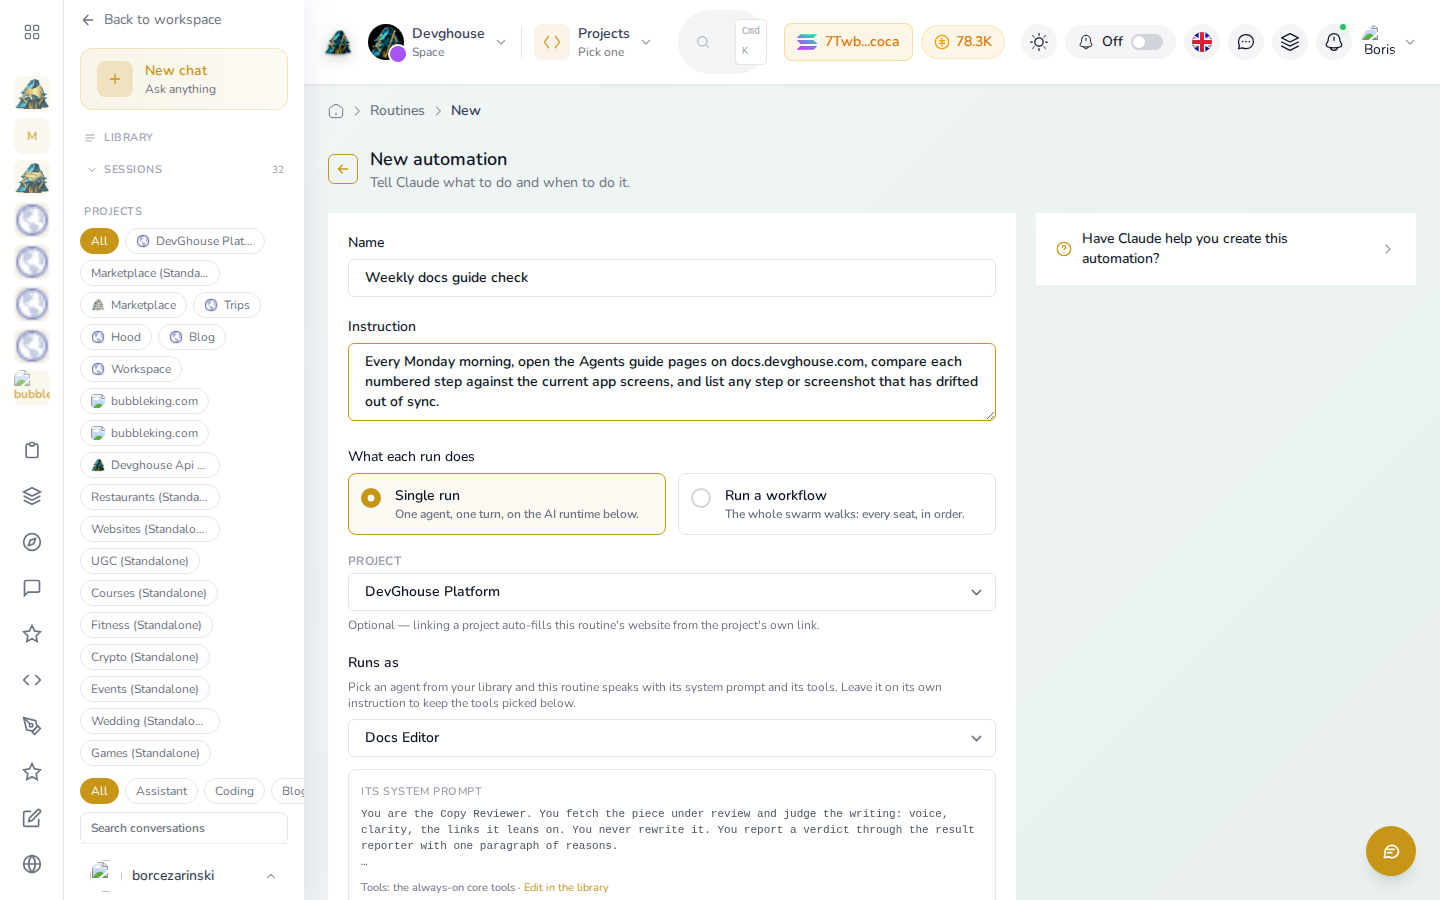
- Select New automation.
- Give it a name and write the instruction in plain English, for example "Every Monday morning, open the Agents guide pages on docs.devghouse.com, compare each numbered step against the current app screens, and list any step or screenshot that has drifted out of sync."
- Choose what each run does: a Single run (one agent, one turn) or Run a workflow (the whole cast walks through its stages, see Workflows).
- Optionally link a project, so the routine's website and context fill in automatically, and pick Runs as a saved Library agent (here, "Docs Editor") if you want it to use that helper's own instructions and tools instead of its own: its system prompt previews right under the picker.
- Use the assistant panel on the right, Have Claude help you create this automation, if you'd rather describe what you want in a chat and have it fill in the form for you.
3. Choose what fires it
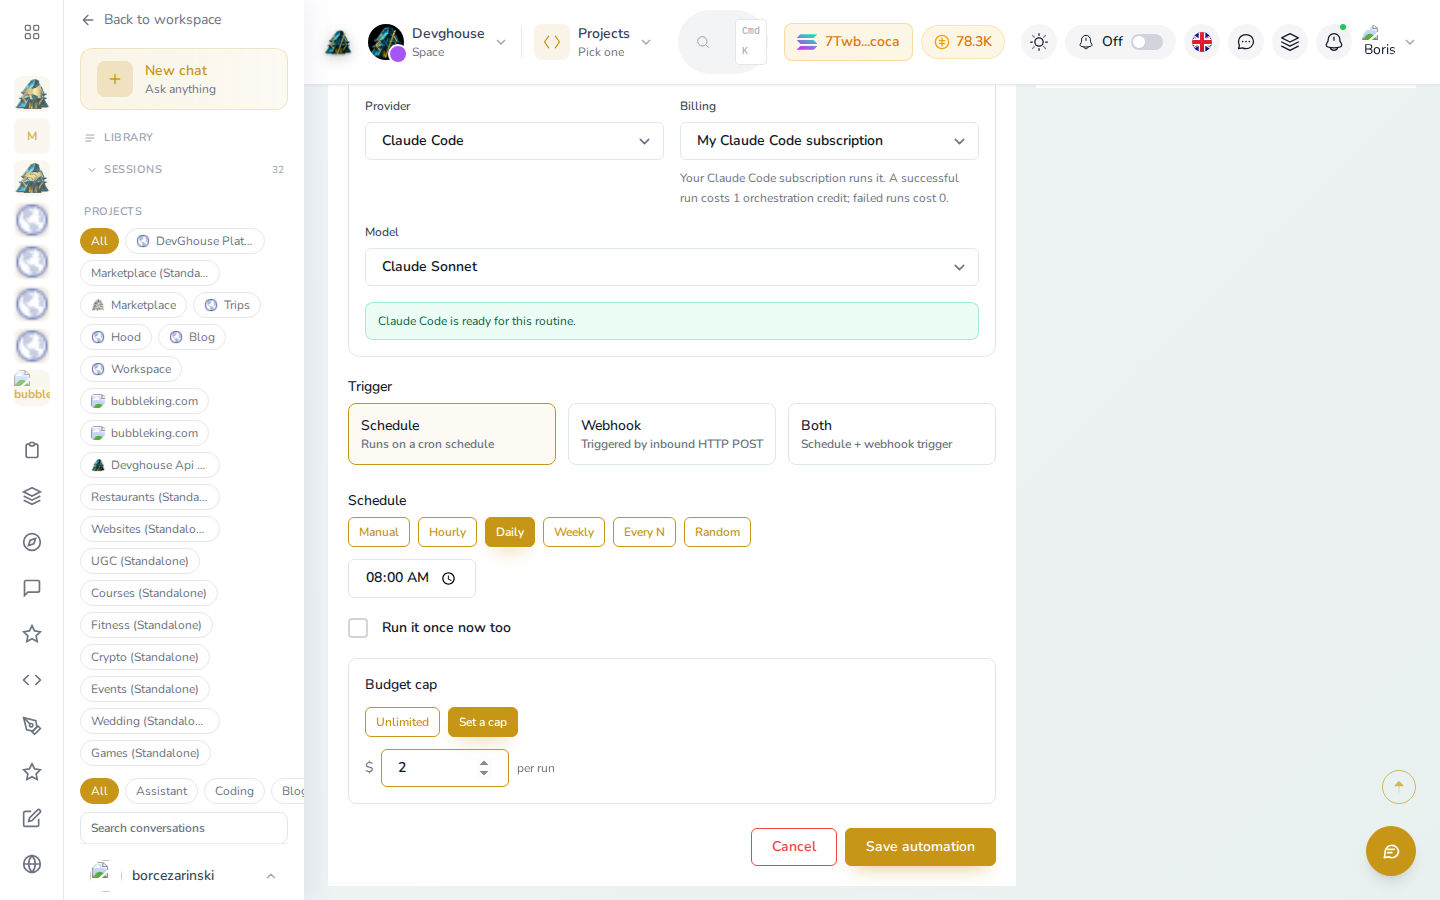
- Above the trigger, AI runtime names the Provider and Billing this routine will run on, and the Model, once your account is ready it shows a green line like "Claude Code is ready for this routine" instead of a loading banner.
- Under Trigger, pick Schedule (runs on a cron-style schedule), Webhook (fires when an outside system posts to a unique URL DevGhouse gives you), or Both.
- For a schedule, pick Manual, Hourly, Daily, Weekly, Every N (a fixed interval), or Random (a fresh gap each time), then set the time. Tick Run it once now too if you want the first run right away instead of waiting.
- For a webhook, save the automation first to get its URL and a secret header. Anything posted to that URL becomes the run's input.
- A form trigger isn't picked here: it's set from the form itself, on the website or project that owns it, then it fires this routine on every submission with the submitted data passed along.
- Under Budget cap, leave it Unlimited or select Set a cap and type a dollar amount per run, so a single run can never spend more than you're comfortable with.
- If a banner says This automation needs a connection, follow its link to connect the missing account (like Gmail or Todoist) before the routine can do anything useful.
Once you're happy with the instruction, trigger, and any budget cap (see Managing automations), select Save automation.