Getting started
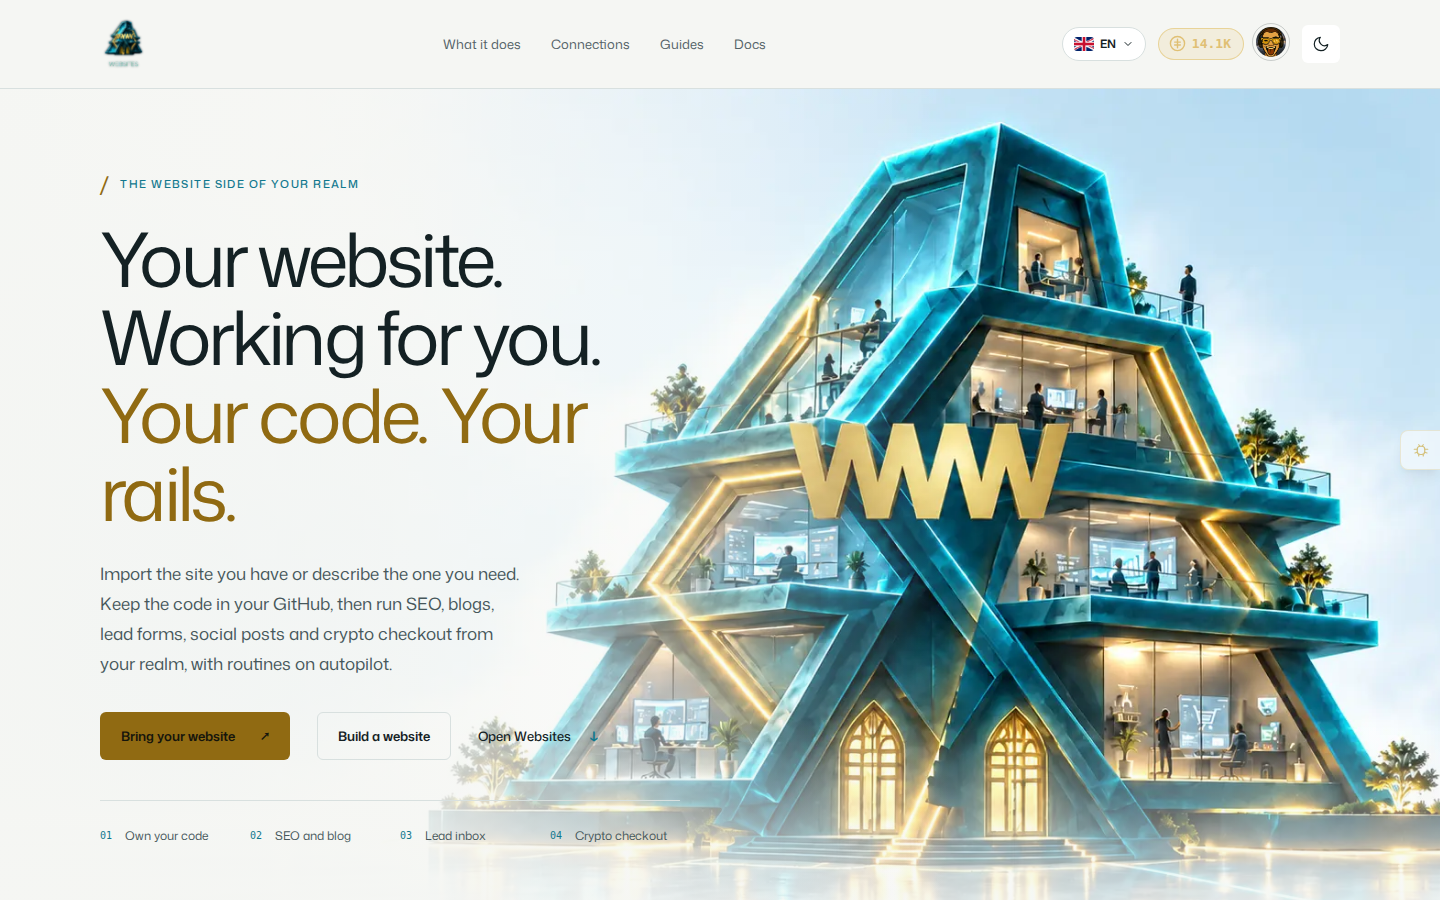
You can start from two places: the websites.devghouse.com site, which explains what Websites does and offers two guided paths, or straight from your workspace at app.devghouse.com/websites, which is the fastest way to connect a site if you already have a workspace account.
The fastest way: Add Website from your workspace
- Sign in to your workspace and open Websites from the left sidebar (it sits under My Assets). If this is your first site, you will see an empty list with an Add Website button.
- Click Add Website. A single form opens: Website URL (required, this is the address your site will live at, and DevGhouse reads its metadata from it automatically), Website Name (optional, defaults to the domain) and a short Description of what the site is for.
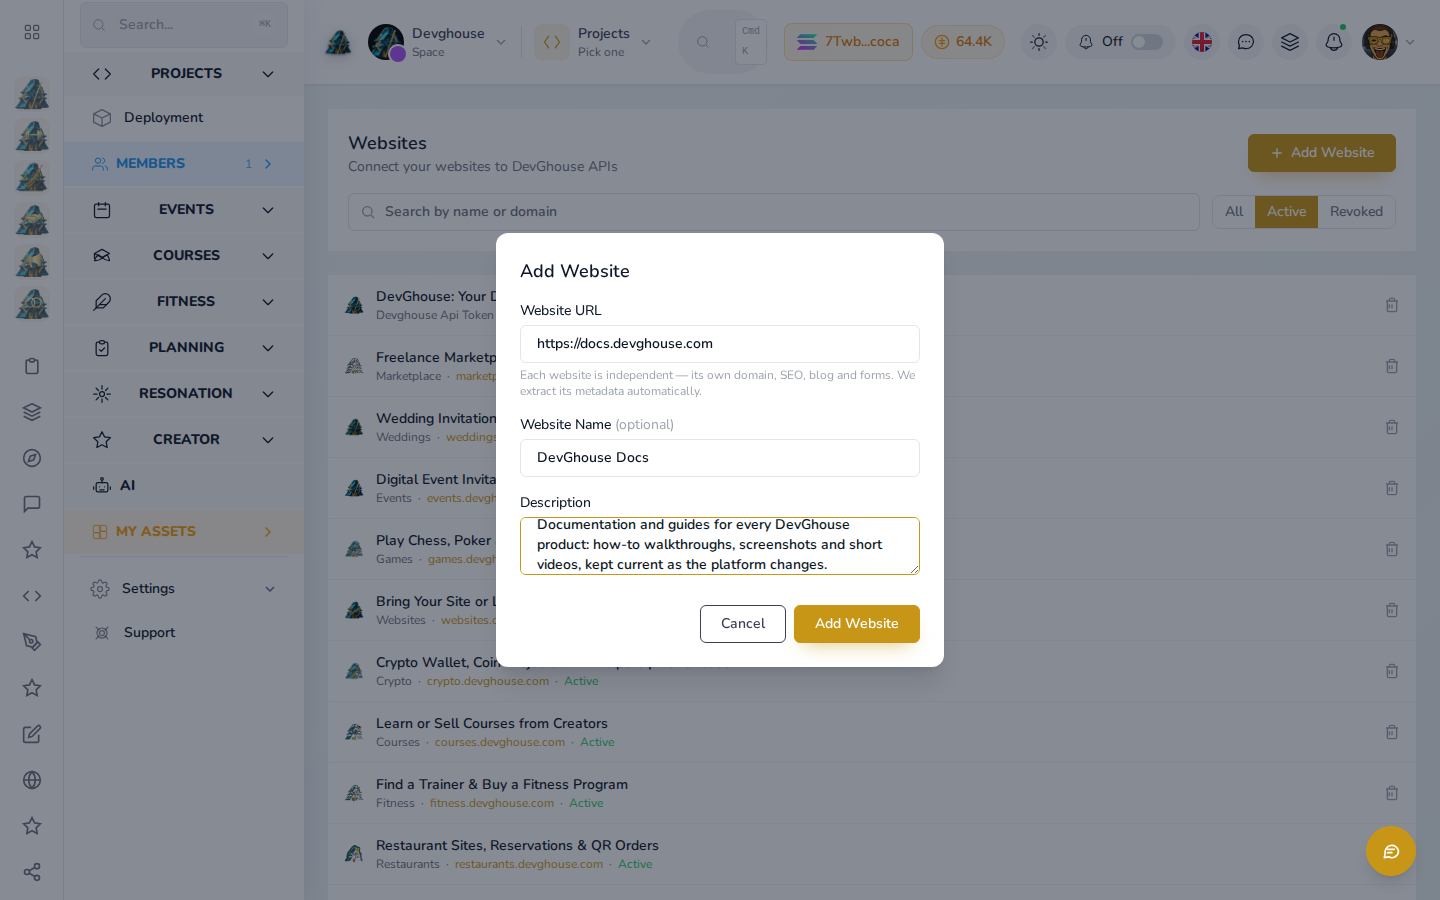
- Click Add Website. There is no separate domain-picker or review step here: the URL you typed in step 2 is the site's address, and the record is created the moment you submit. Tip: right after creating your site, if the page briefly says it could not be opened, refresh the page once. Your site was created, and the first load just needs a second try.
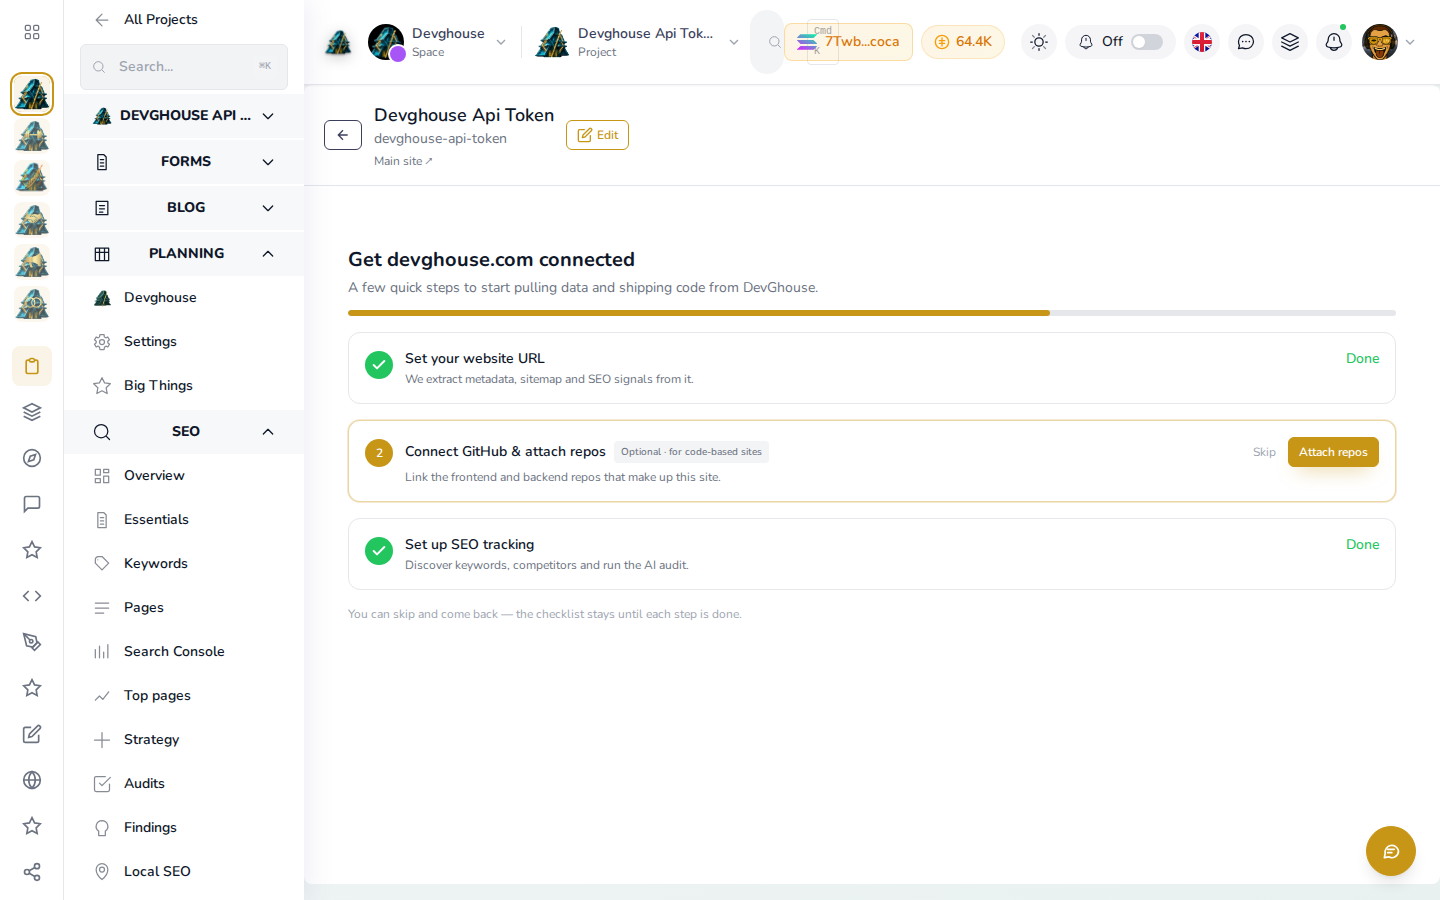
- You land on your new site's dashboard with a short checklist: set your website's live URL, connect GitHub, and set up SEO tracking. Do these in any order, or skip them for now, the checklist stays until each one is done, and updates as you complete steps (this example, DevGhouse's own main site, already has its URL and SEO tracking done, with GitHub still pending).
This path is free. It creates the site record and its dashboard immediately; what you build on top (a real deployed page, a full brand, SEO tracking) is entirely up to you afterwards.
Starting from the public Websites page
From websites.devghouse.com you get two options, useful if you are exploring before you have a workspace account or a specific site in mind:
- Bring your website: you already have a live site. Give its URL, sign in or create an account, choose which capabilities you want (SEO, a blog, forms, GitHub), and Websites reads your existing pages as reference material. This is free.
- Build a website: describe the site you want in plain words and an AI-driven builder writes it into a private GitHub repository for you, with SEO, a blog and forms set up on top. This is a paid, guided build, and it walks you through 7 steps:
- Who is this site for. Pick the personal or realm context it will live in. A context that already runs a website is left off the list.
- What will this site use. Choose database-driven (edited from the dashboard, like the rest of this guide) or no-build (a static site that lands straight in your own GitHub), then toggle SEO, blog and performance tracking on or off.
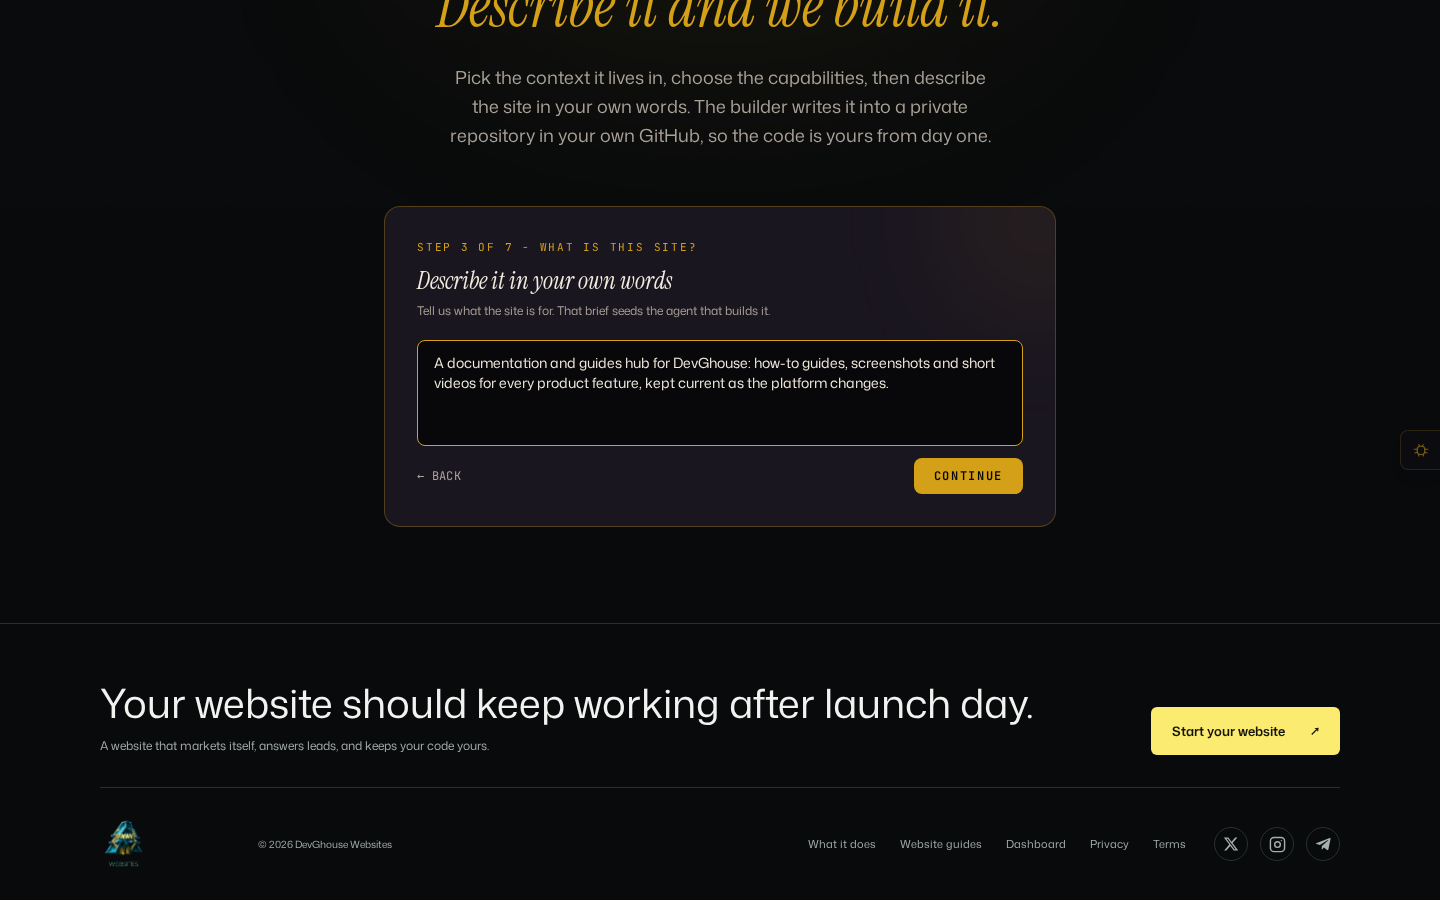
- What is this site. Describe it in your own words: this brief is what seeds the AI agent that builds it.
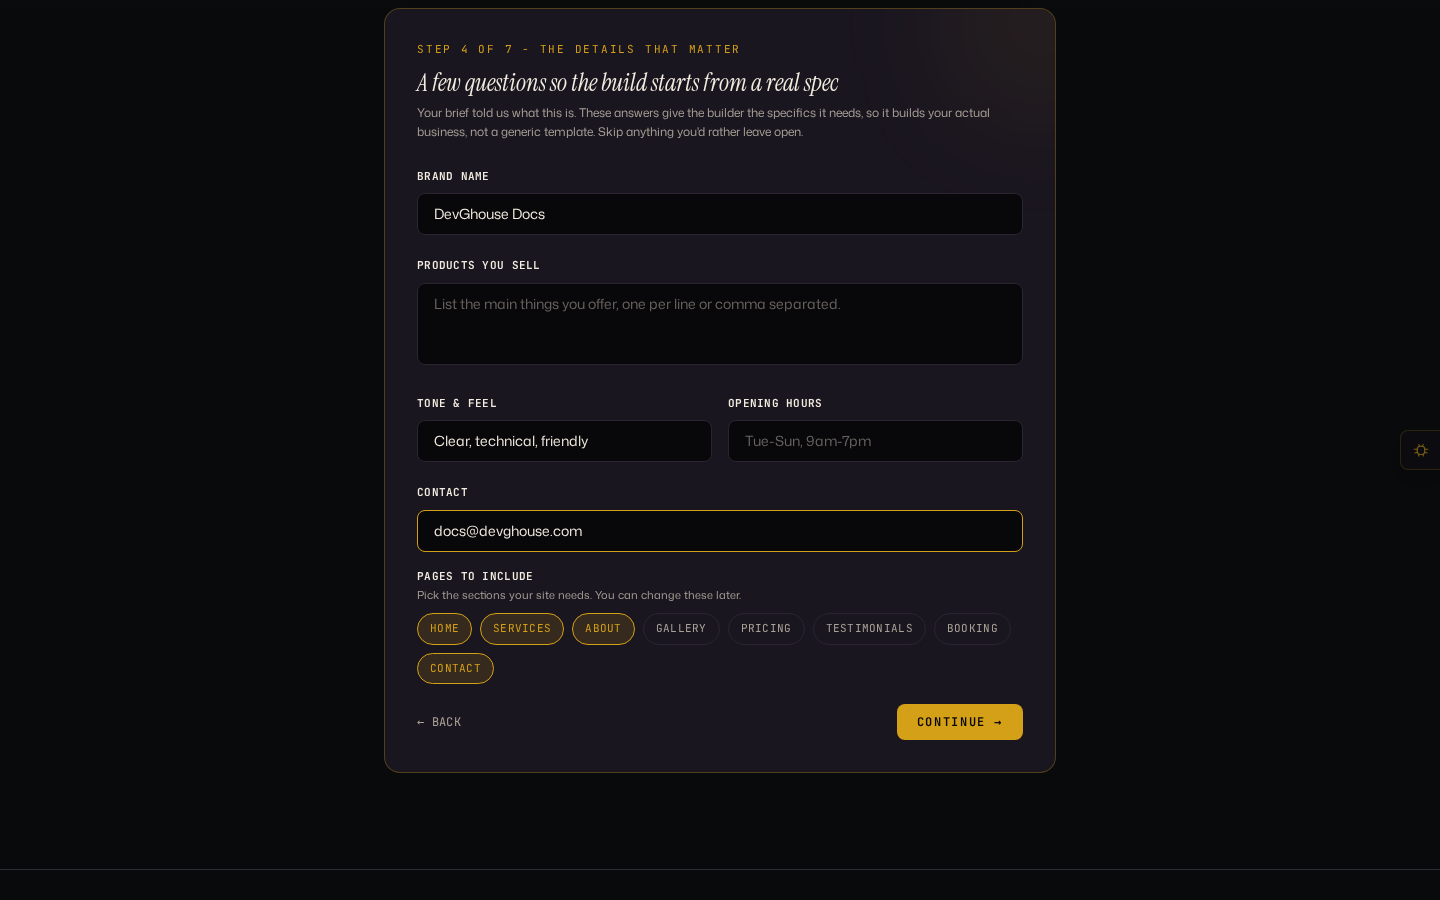
- The details that matter. A few concrete questions (brand name, what you offer, tone, opening hours, contact details, and which pages to include) so the build starts from a real spec instead of a generic template.
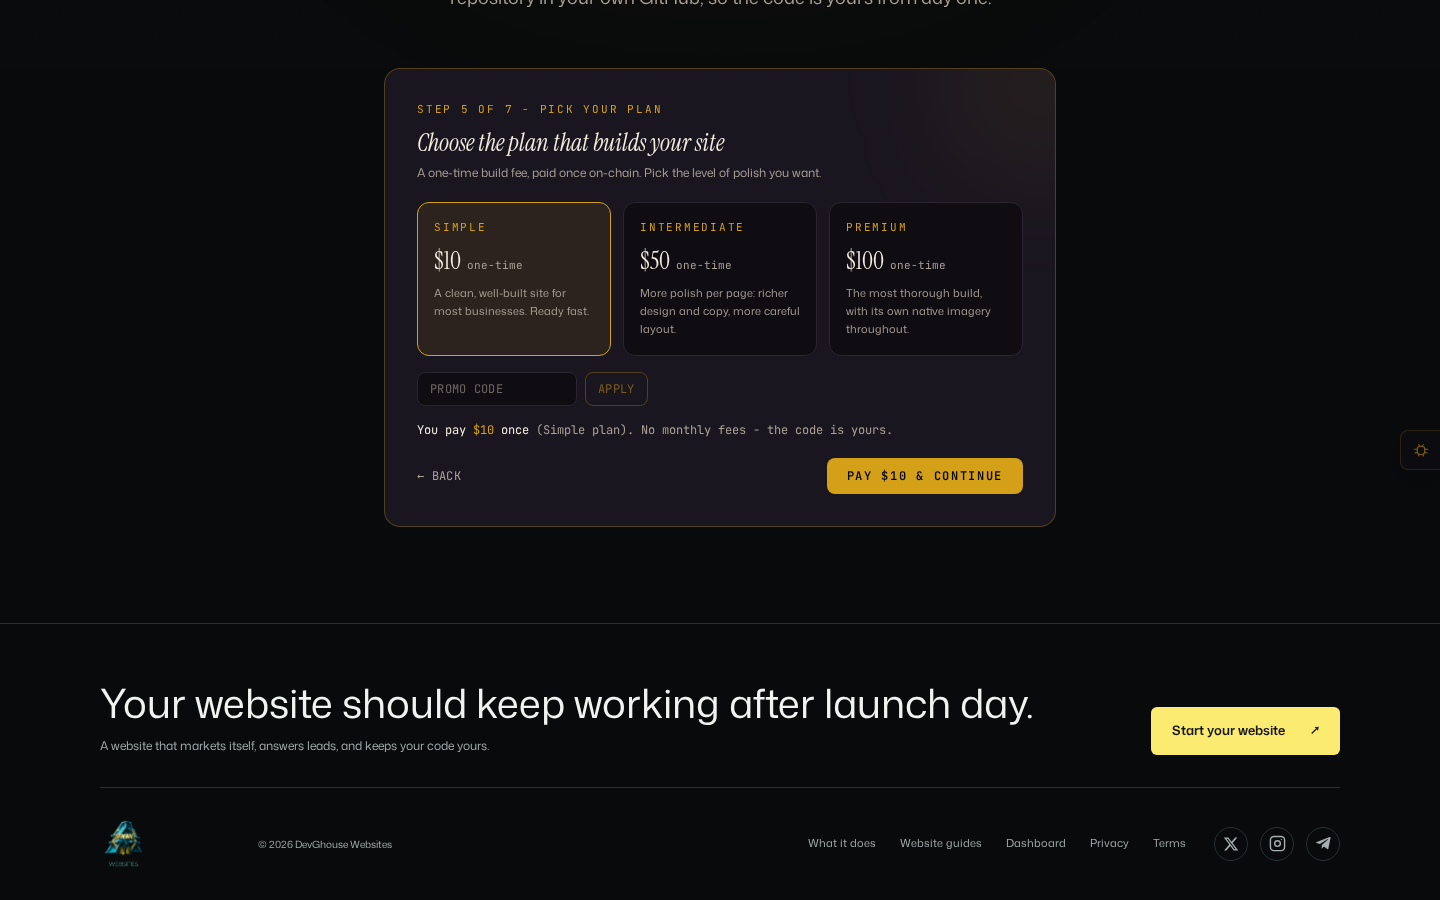
- Pick your plan. A one-time fee, paid once on-chain, from 10 to 100 US dollars depending on how much polish you want. This is the point of no return: stop here and close the tab if you were only looking, since the next click pays and starts the build.
- Connect GitHub, so the build has a private repository to write into.
- Final review before the agent starts building.
If you do not want to pay for a guided build, use Add Website from your workspace instead and build or connect your own code afterwards at no charge.
Both options ask you to sign in or create a free workspace account partway through if you are not already signed in.
Finding a site again
Every site you connect shows up at app.devghouse.com/websites, and also as its own project in your workspace's project list. Click a site's name to open its dashboard. Brand, SEO, forms, code and everything else in this guide live there, in the sections down the left side once you are inside.
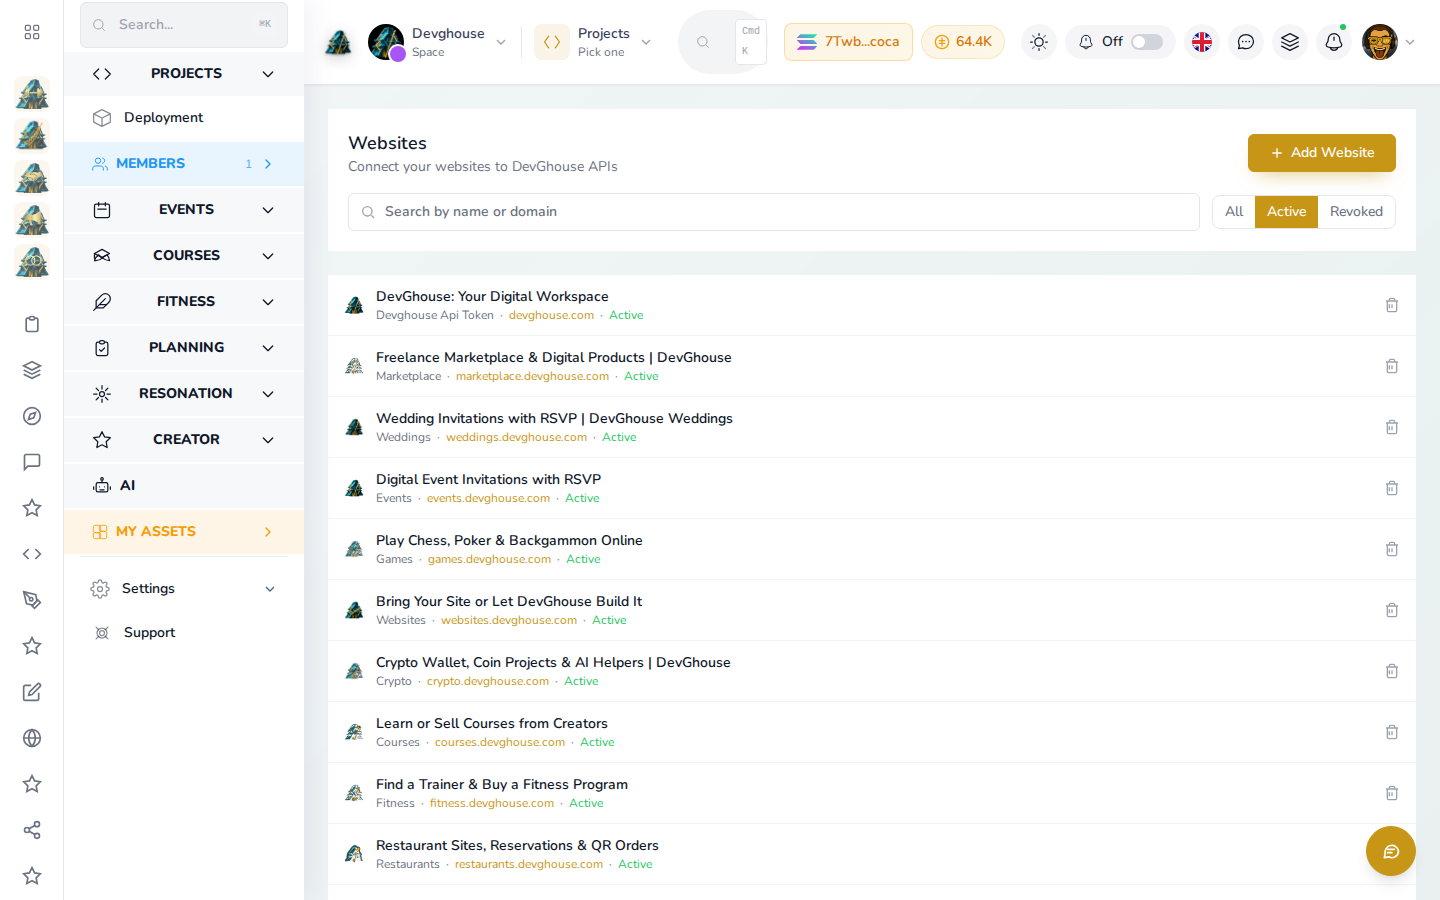
A free account can connect up to 10 websites.