AI Agents and Models
Every AI chat, automation, and agent run in DevGhouse has to run somewhere. By default it runs on DevGhouse's own account, and you pay in DevGhouse credits. If you already pay for Claude, Codex, or Kimi yourself, you can link your own login instead, and DevGhouse uses that subscription for the run. You only ever pay DevGhouse credits for a run that succeeds, and linking your own subscription drops that cost to a flat, small amount instead of a per-token bill.
Open AI Settings
- Click your account picture in the top right corner.
- Click LLM Settings.
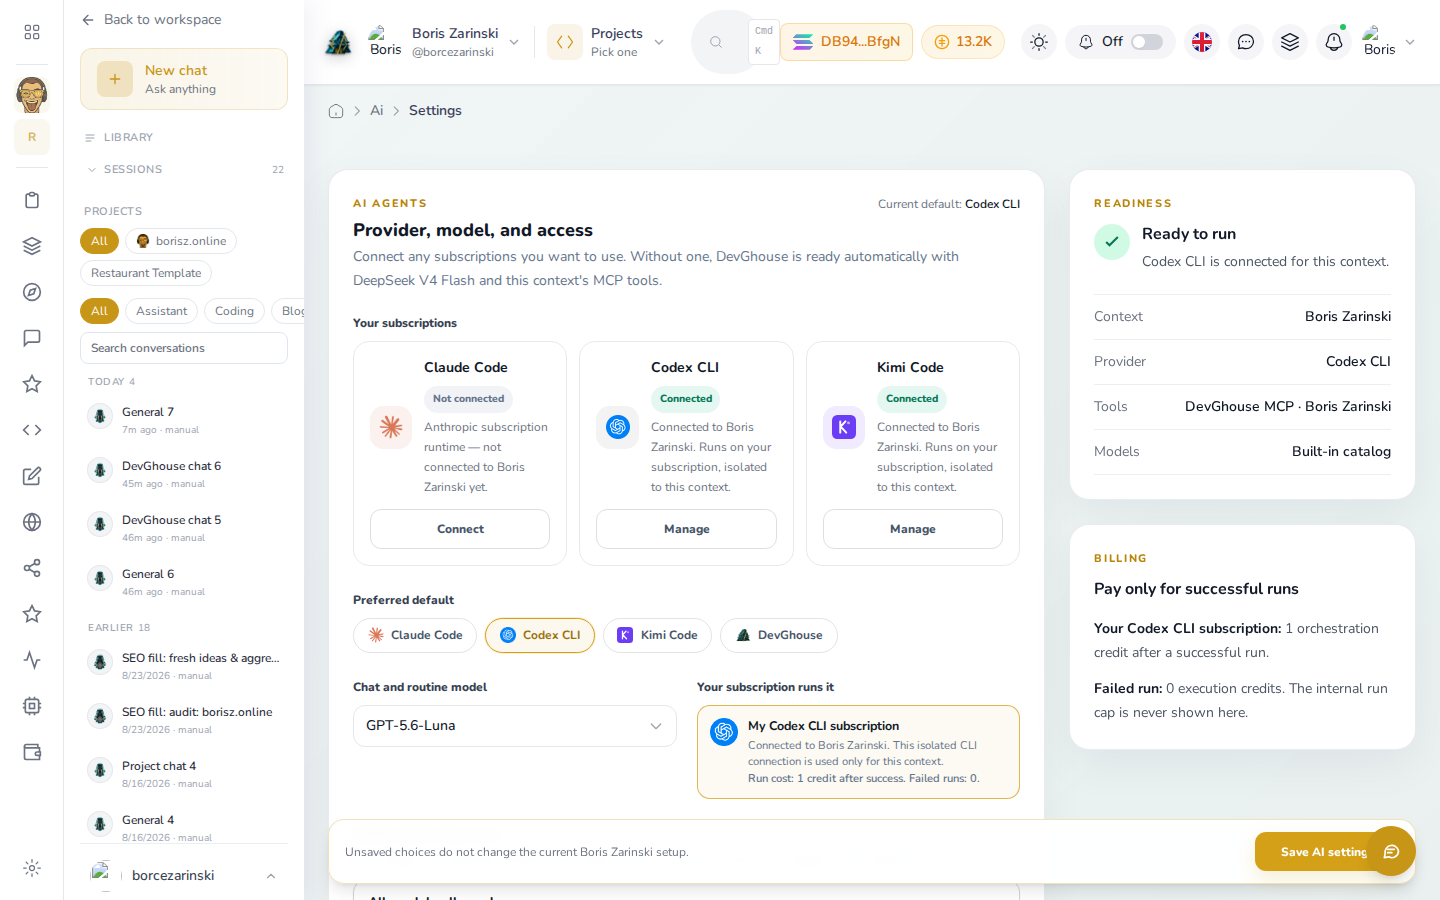
This page shows three AI agents you can connect: Claude Code, Codex CLI, and Kimi Code, plus your current default and a readiness summary on the right.
Connect your own subscription
- On the card for the provider you want (Claude Code, Codex CLI, or Kimi Code), click Connect.
- Follow the sign-in flow for that provider. This is a real login to your own account, not a pasted API key, so DevGhouse never sees your password.
- Once connected, the card shows Connected, and you can click Manage any time to check on it or disconnect it.
- Under Preferred default, choose which connected provider your chats and automations should use.
A run on your own subscription settles at a flat rate (shown under Billing) once it succeeds, and nothing at all if it fails. A run on DevGhouse's own account is metered instead, based on what the AI actually used.
Connect your own Claude subscription for agent runs
This is the same "Claude" connection used for AI Automation runs, reached directly at Connections → Claude or from the Claude card above.
- Click Connect with Claude.
- A Claude approval tab opens. Approve access there, then copy the code it shows you.
- Paste that code back into DevGhouse and click Finish linking.
- If you would rather not use the browser flow, open Advanced: paste a setup-token, run
claude setup-tokenin a terminal where the Claude CLI is installed, and paste the token it prints into the Setup token field.
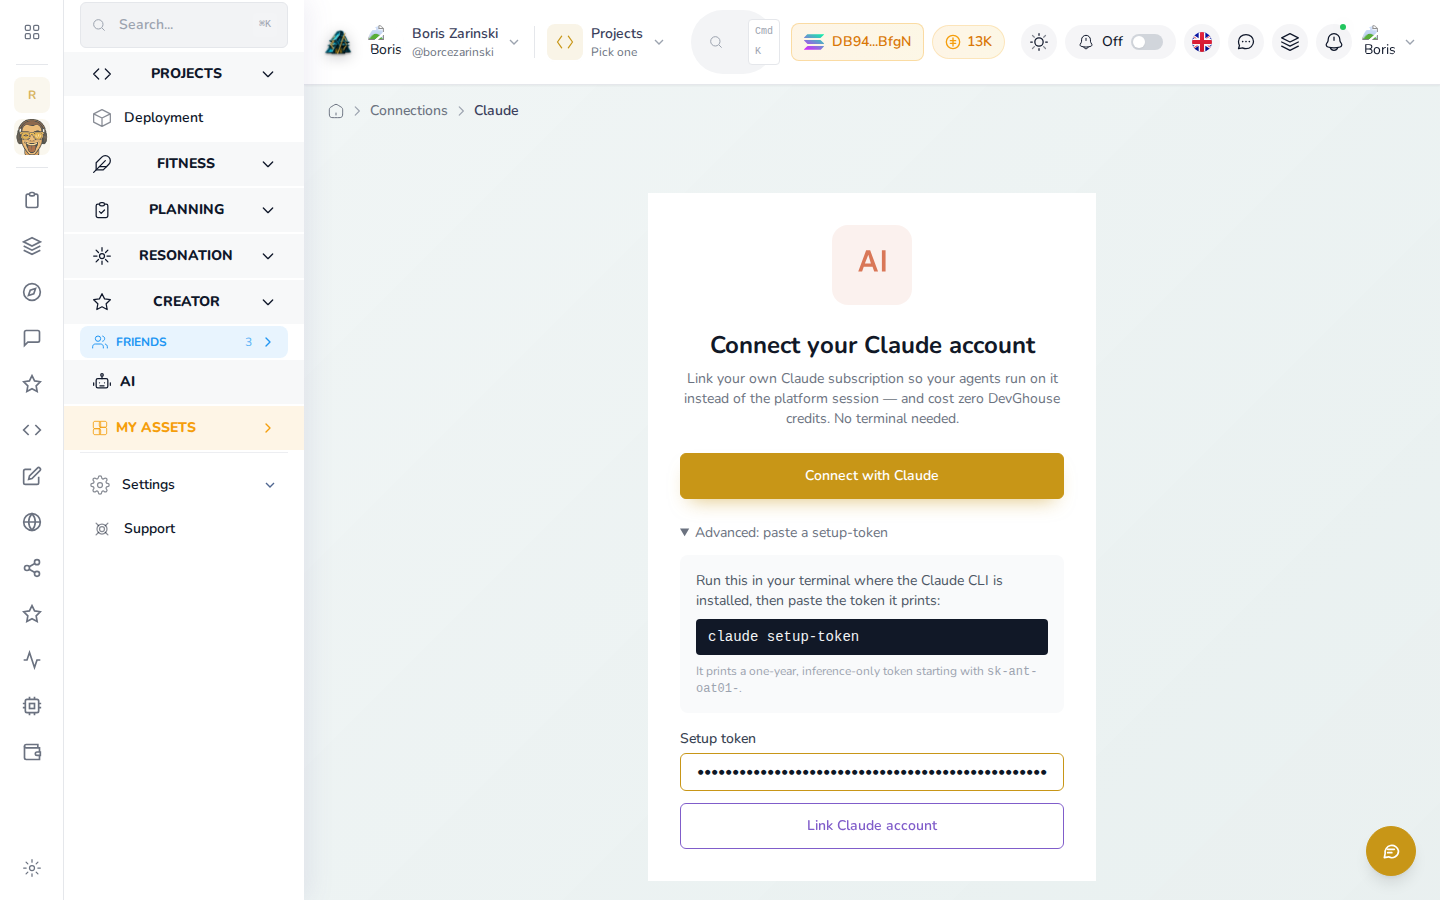
- Click Link Claude account to finish.
Once linked, the page shows Linked with your token's expiry date. If the token expires or you revoke it from Claude's side, DevGhouse falls back to its own account automatically and asks you to reconnect.
Bring your own OpenRouter key
OpenRouter gives you a wider choice of AI models, billed to your own OpenRouter account instead of DevGhouse credits.
- Go to Connections → OpenRouter.
- Get a key at openrouter.ai/keys if you do not have one yet.
- Paste it into OpenRouter API key.
- Choose a Model from the list.
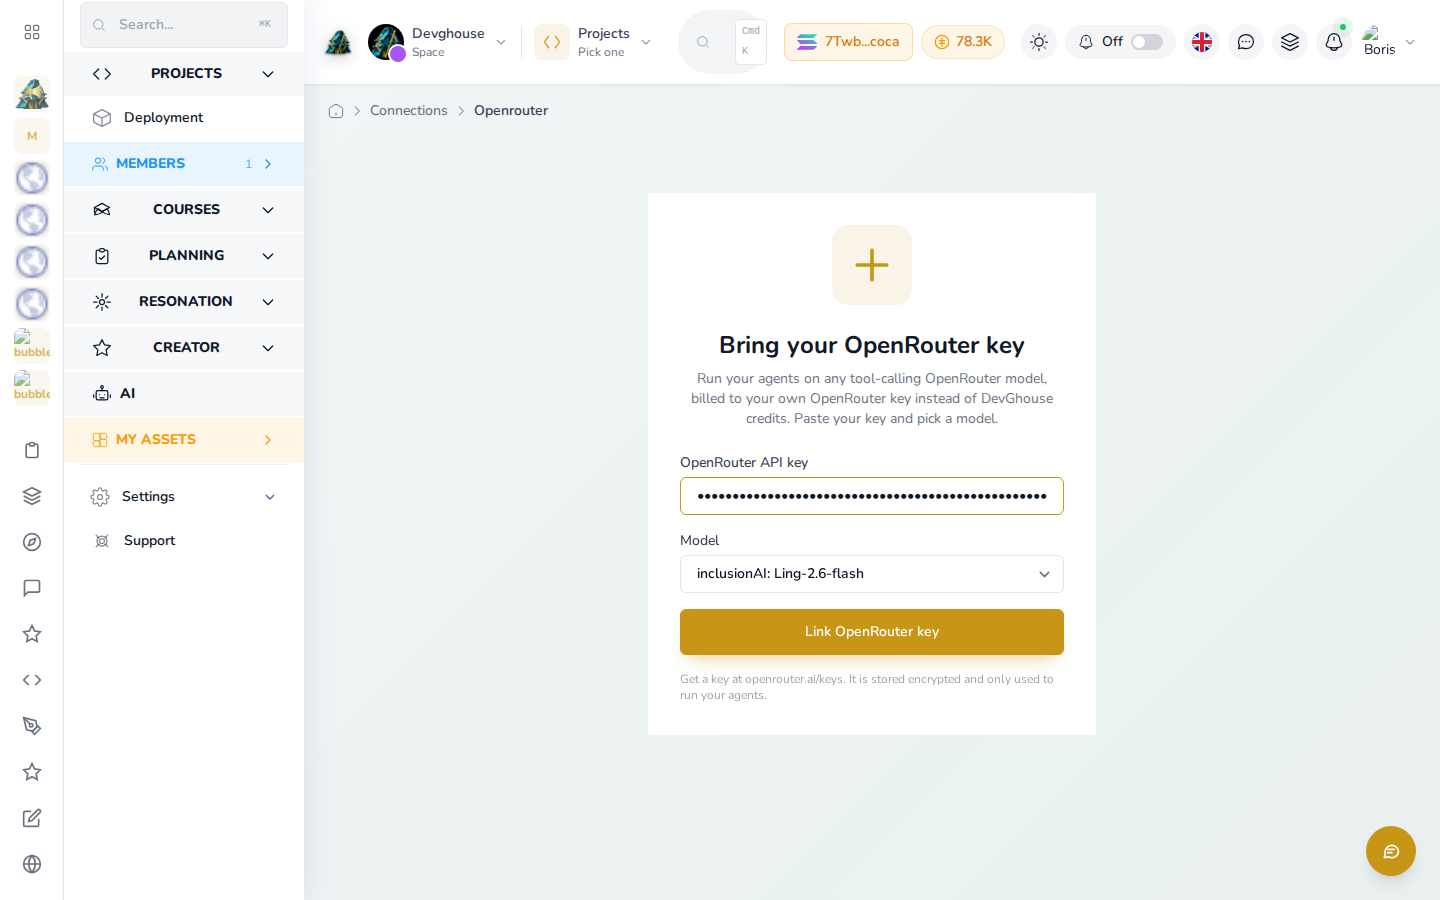
- Click Link OpenRouter key.
Your key is stored encrypted and only ever used to run your own agents.
For agents and routines
Once a provider is connected, get_default_ai_models shows what is currently set up, and set_default_ai_models switches the default provider and credential source for chats and routines in the current context. This is the same setting the AI Settings page changes, just reachable from an assistant that already has your MCP Server connected.