Travellers and the trip page
Inviting travellers
Travellers in the sidebar is your guest list: who's invited, who's accepted, who hasn't answered yet.
- Click Add traveller and fill in a name (email is optional, but it's how they receive the invite).
- Repeat for each person, or import a batch from a CSV file (there's a sample file linked on the page if you want to see the format first).
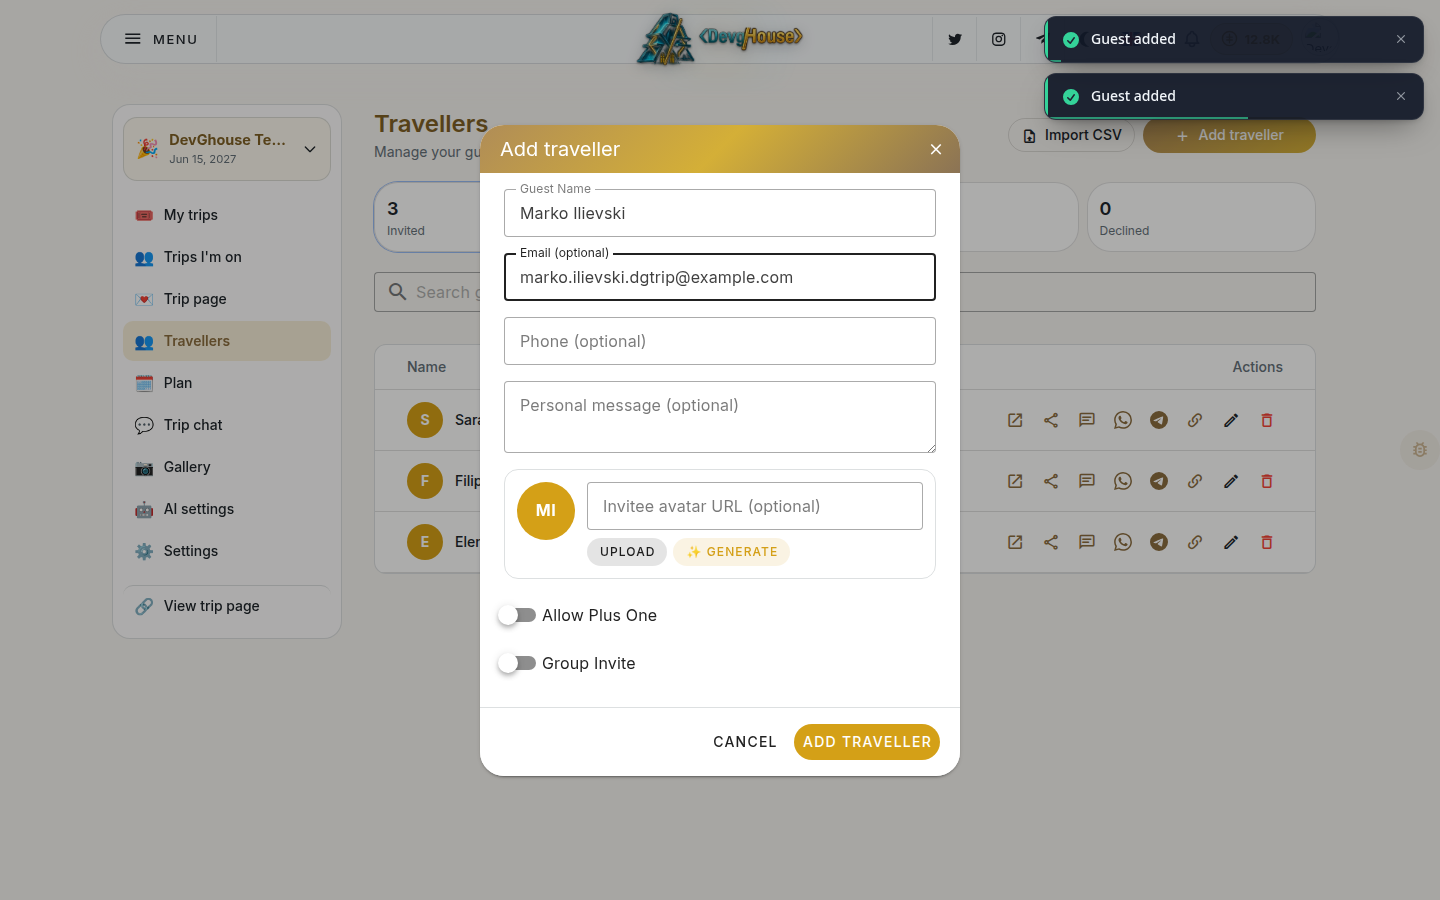
Either way, each traveller gets an invitation and can RSVP.
The fastest way to fill a trip, though, is usually the join link.
The join link
Go to Settings and find the Join link section. Turn it on and the section changes to show the live URL alongside Copy, a field to cap it at a maximum number of uses, Regenerate (swaps in a new URL and kills the old one), and Disable.
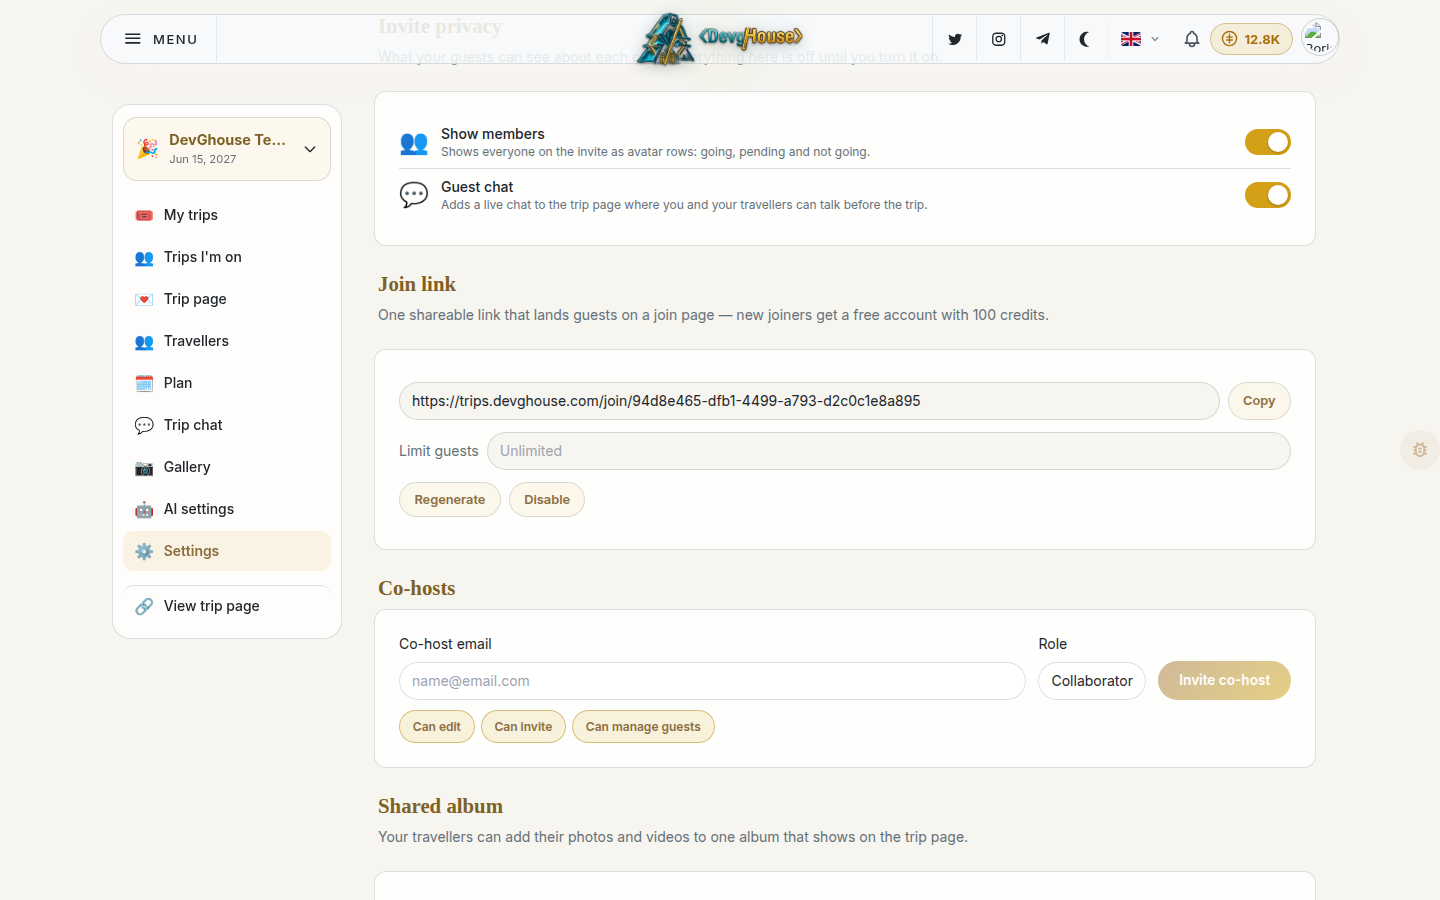
Anyone who opens that link can join the trip, and if they don't have a DevGhouse account yet, joining creates one for them with 100 free credits, no separate sign-up flow required.
What a traveller sees
Once someone joins, or opens the link from an invitation, they land on the trip page: a public page at your trip's own web address, built to answer "am I going, and what's the plan" without needing to dig through a dashboard.
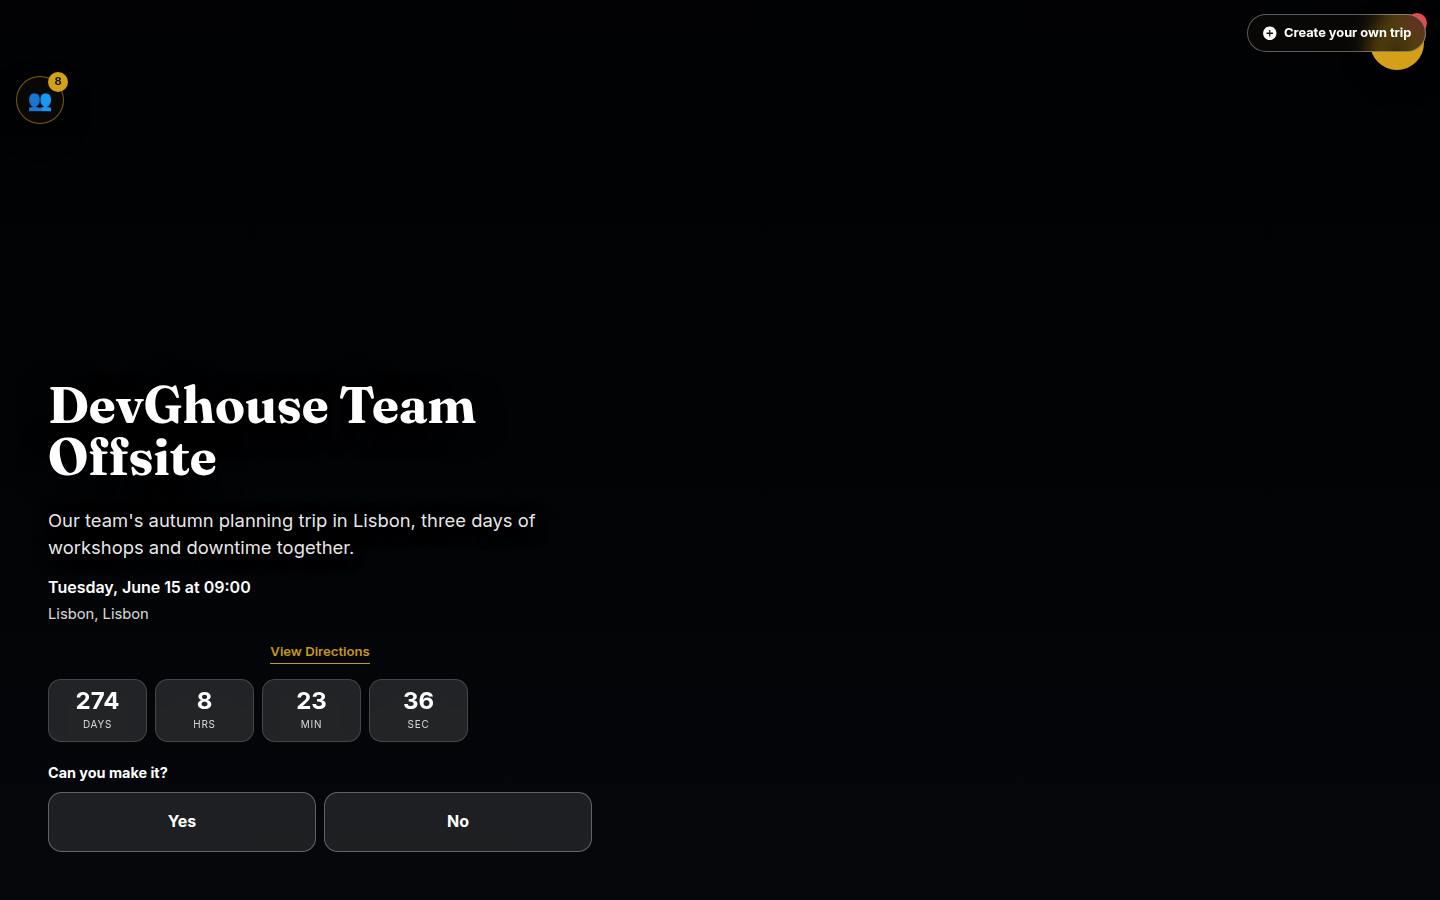
From here, a traveller can RSVP, open the trip chat, and scroll down to see the itinerary and who else is coming. They don't need co-planner access to do any of that; that level is reserved for people you specifically invite to help manage the trip, from the Co-planners section on the Plan page.
Customizing the trip page
If you want more control over how the trip page looks, there's a page builder under Trip page in the sidebar, with a phone and desktop preview. You can rearrange sections, swap the cover photo, and preview exactly what travellers will see before you share the link.