Custom sections
Every template comes with the usual sections: story, gallery, countdown, and so on. If you want something the template gallery doesn't offer, an animated save-the-date banner, a dress-code card in your own colors, a custom section studio can build it for you from a plain description, with no design or code work on your end.
Turn it on
Custom sections is one of the Advanced tools, switched off for every new wedding. Turn it on first:
- Open Settings from your dashboard.
- Scroll to Advanced tools and switch on Custom sections.
- It now appears under More tools in your sidebar.
Describe what you want
Open Custom sections from More tools. On the left is a chat; on the right is a list of everything you've built so far.
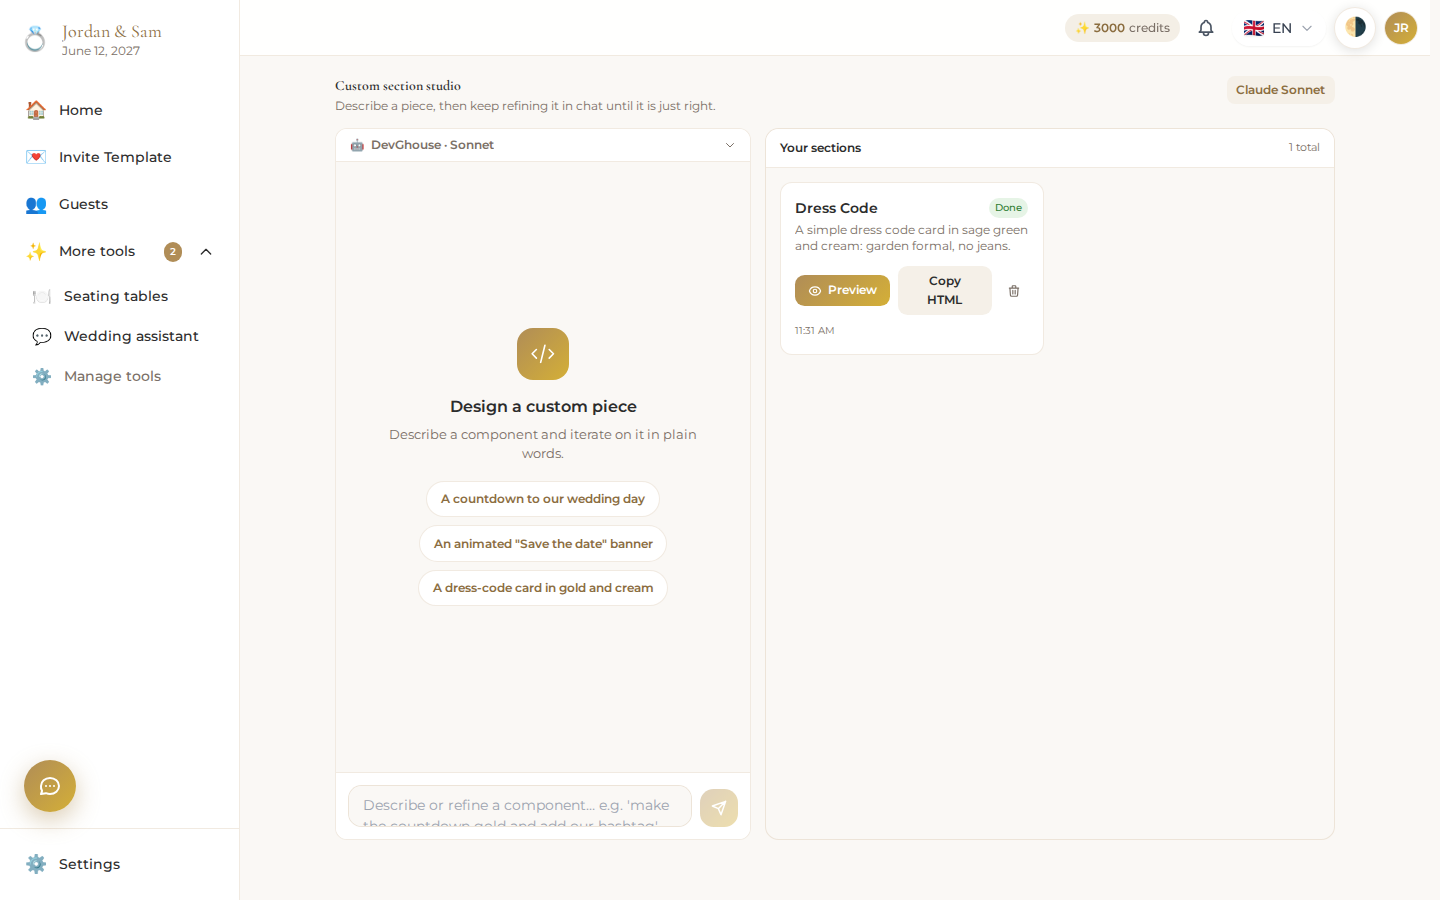
Describe the section you want in plain language, for example a countdown to your wedding day, or a dress-code card in gold and cream. The studio (built on Claude) writes it and adds it to your list as Queued, then Building. Keep chatting in the same thread to ask for changes, a different color, bigger text, and the studio updates the section in place.
Work with a finished section
Once a section shows Done, three actions are available on its card:
- Preview opens it full-screen so you can see exactly how it will look.
- Copy HTML copies its raw code, if you want to reuse it somewhere else.
- The trash icon deletes it for good.
Where it shows up
A finished section is added automatically to your live invitation, guests see it without you doing anything else. It appears near the bottom of the page, after your other sections. This only works if your invitation is set to the Scroll layout (see Design your invitation); Folded and Stories layouts don't show custom sections yet.
What it costs
Building or updating a section spends a small number of wedding credits, the same way any other AI generation on your wedding does; a failed attempt costs nothing. See Credits and billing for what other actions cost.