Design your invitation
Browse styles
Before you even sign up, you can look through every available template at weddings.devghouse.com/templates. Each one shows a preview image and a short description of its look, and clicking Preview on any card opens a full, working sample invitation in that style, cover, story, gallery, map, and RSVP included, before you decide.
Once you're signed in, the Invite Template screen in your sidebar shows the same picker, now working on your own invitation: pick a template and the live phone preview repaints with your own names straight away.
Open the invite builder
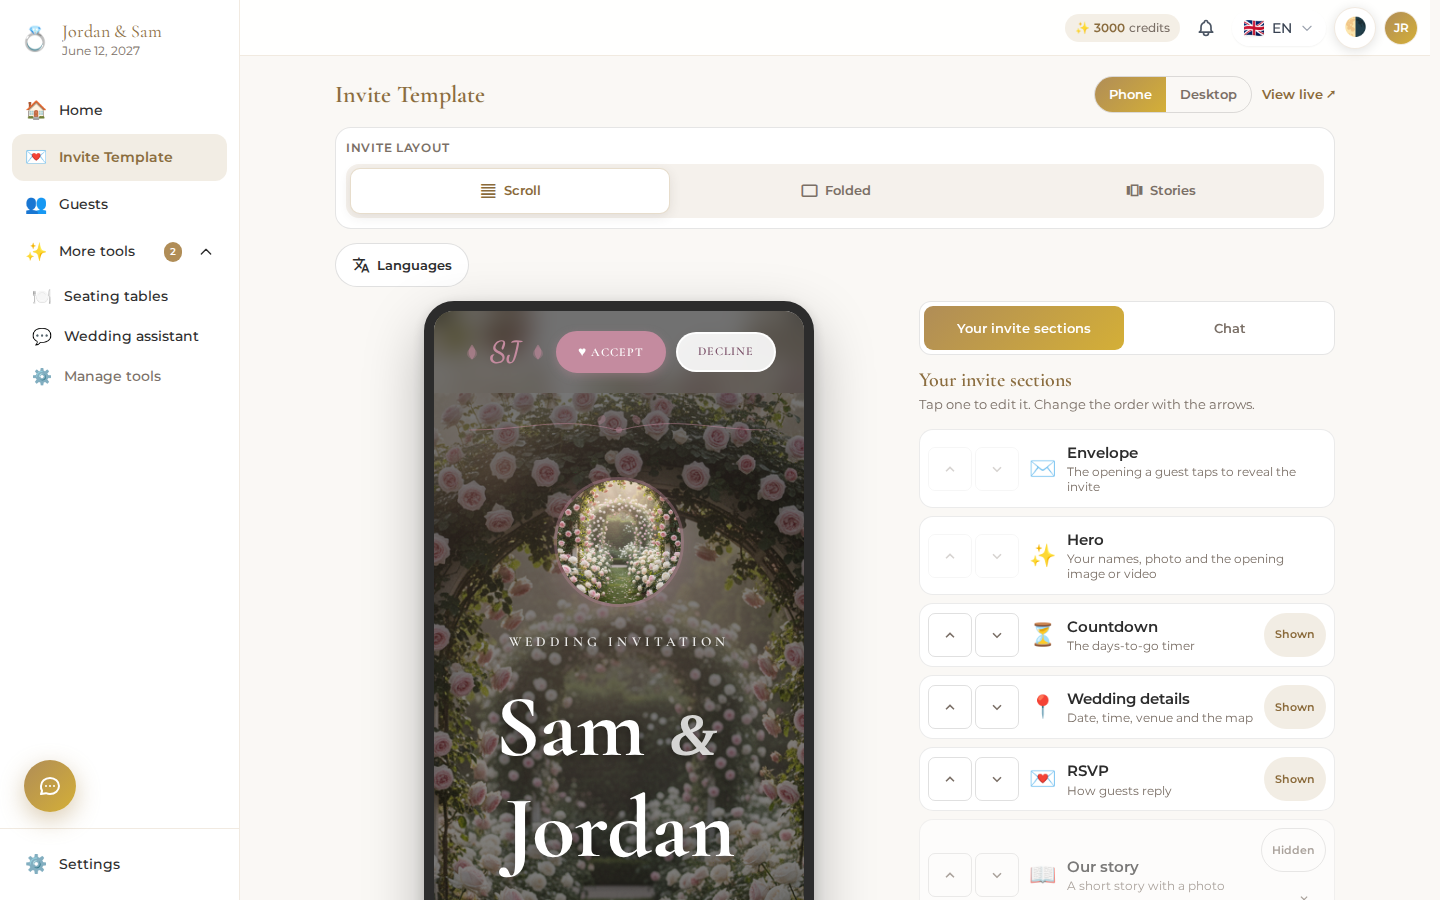
From your dashboard, click Build invite (or Edit invite once you've started). The builder shows your invitation exactly as guests will see it, with your changes editing that same live view.
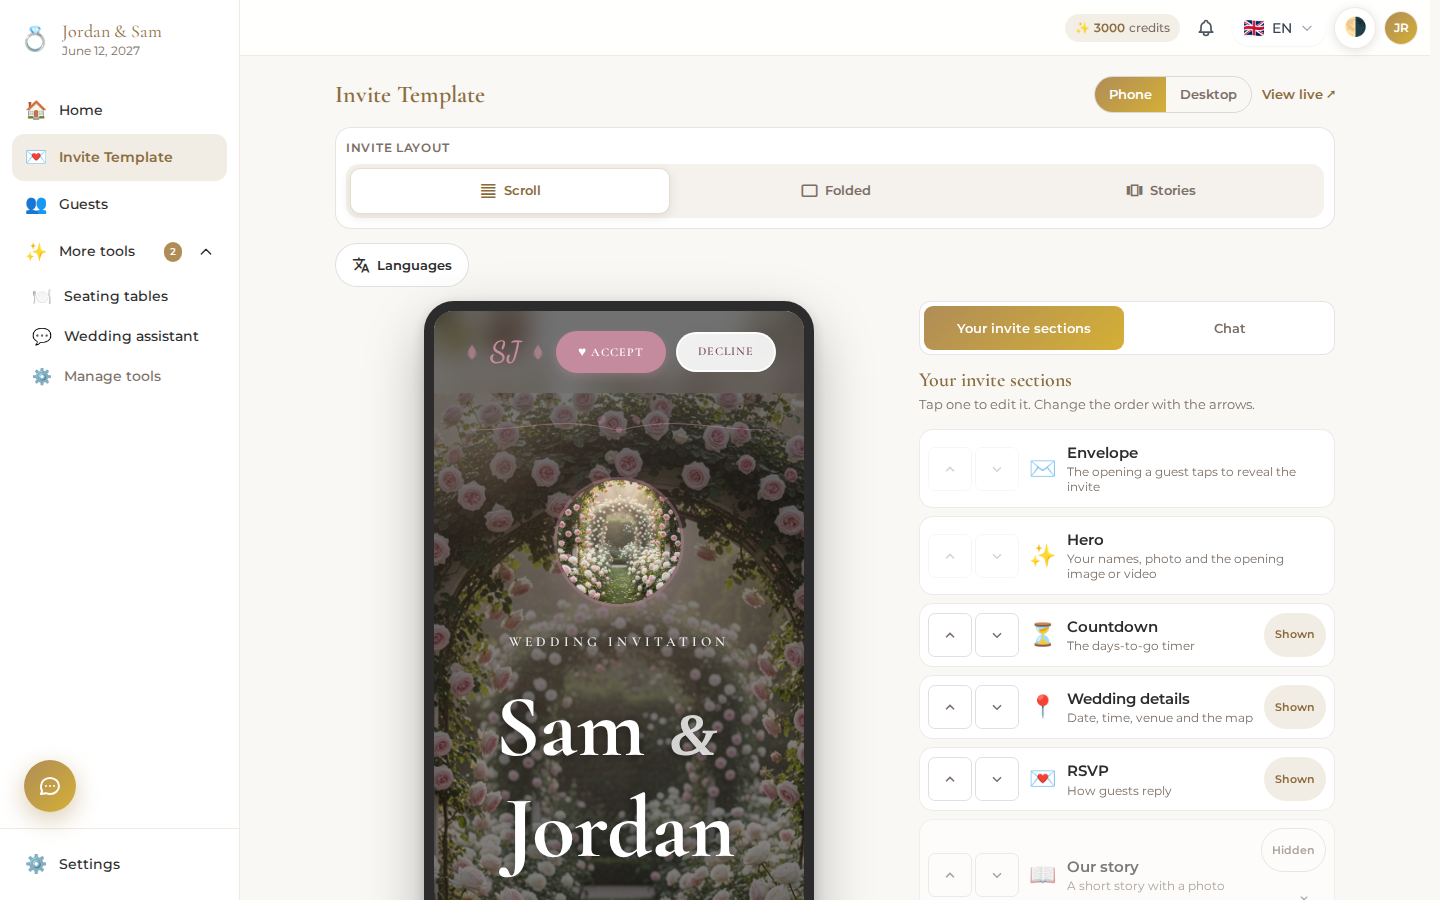
- Use the Phone / Desktop toggle at the top to check how your invitation looks on each.
- View live opens your actual public invitation page in a new tab.
- Your changes save automatically; a small status label near the title shows Saving… and then Saved.
Choose a layout
Pick how guests move through your invitation:
- Scroll – one continuous page, guests scroll down through every section.
- Folded – sections appear as separate cards, like folded paper.
- Stories – full-screen sections guests swipe or tap through, phone-story style.
Work with sections
Your invitation is built from sections, listed in the rail beside the preview. Some are locked because every invitation needs them; the rest you add only if you want them.
Always present:
- Envelope – the cover guests tap to open your invitation.
- Hero – your names and date, front and center.
- Footer – closes out the page.
Add or remove freely:
- Countdown – a live countdown to your wedding day.
- Details – date, time, and venue, with a map.
- RSVP – the form guests use to respond.
- Our Story – how you met, in your own words.
- Photo Gallery – a grid of your photos.
- Gift Registry – links to where guests can find your registry.
- Custom – a free-form block for anything else you want to say.
For each section: click it in the rail to open its editor and change its text, photos, and colors; use the arrows to move it up or down the page; toggle it off if you don't want it to appear right now.
Start from a different template
Changed your mind about the look? Open Change look near the bottom of the sections rail and pick a different template. This resets the invitation's starting style; sections you've already written stay as you left them.
Design it with chat instead
Switch the panel from Your invite sections to Chat to describe changes in plain language instead of clicking through menus, for example asking to swap the color palette or rewrite your story section in a different tone. The wedding assistant makes the edit directly in your invitation; see Wedding assistant for what else it can do.
Multiple languages
Click Languages above the sections rail to add another language to your invitation. Guests who open your link see a language switcher and can read your invitation in whichever one they prefer.