Planning and guest chat
Planning
Open Planning in the sidebar for a day-by-day itinerary of your event: stops, travel legs, and the times and places they happen.
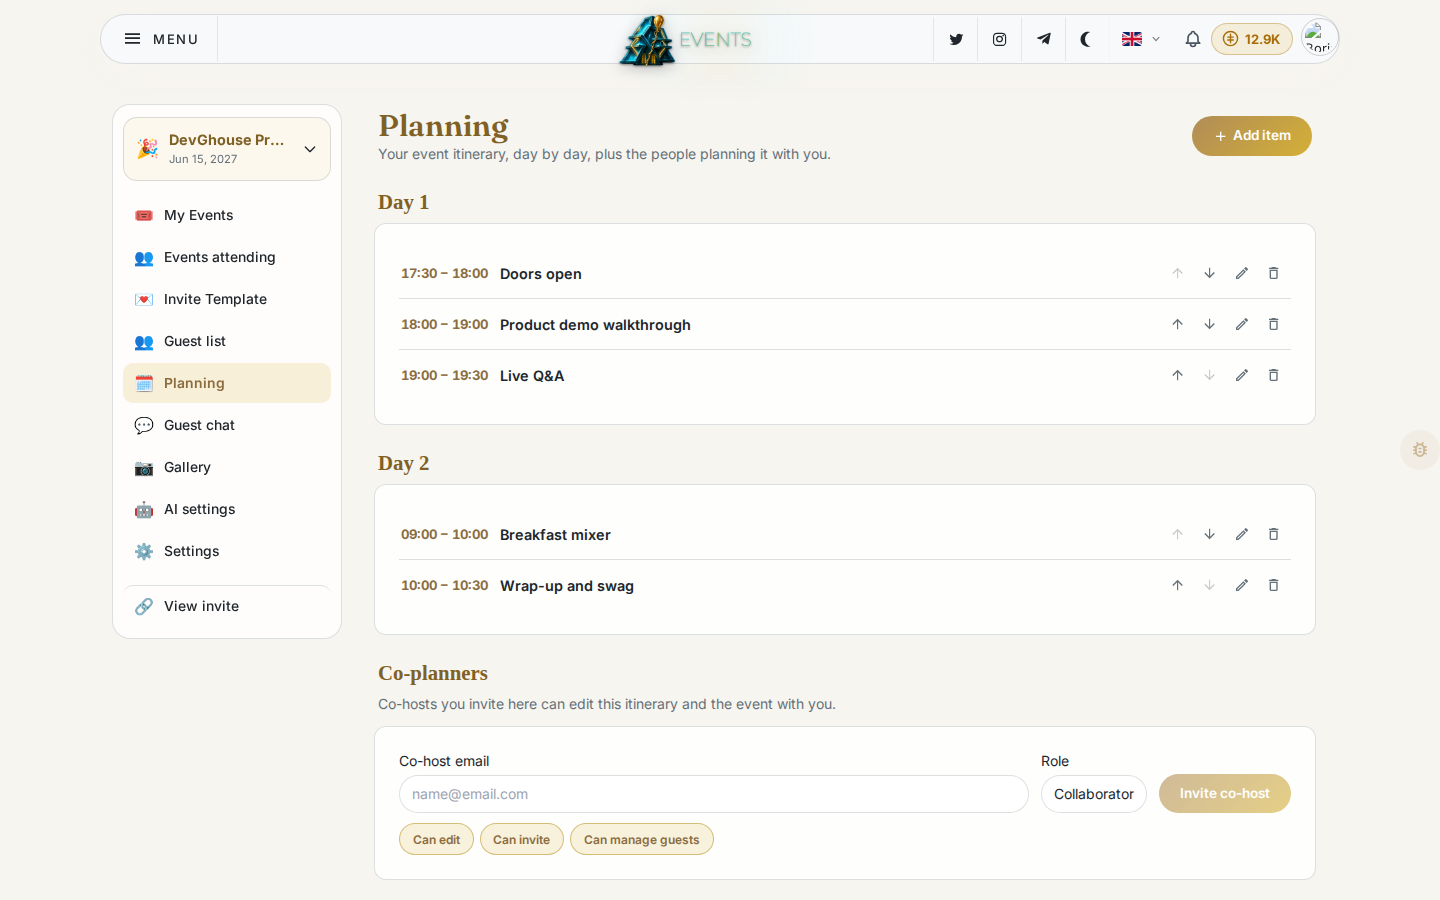
- Click Add item (or Add first item if the plan is still empty).
- Give it a title, a day, a start (and optional end) time, and a location.
- Mark it as a regular stop or a Travel leg if it's how guests get somewhere.
Items are grouped by day automatically. Use the up and down arrows on a row to reorder it within its day, the pencil to edit it, or the trash icon to remove it.
Turn on the Schedule section on your invite if you want guests to see this itinerary on the invite page itself; it's off by default.
Co-planners
Every page that has planning work, Planning itself and Settings, has a Co-planners panel where you invite someone else to help:
- Enter their email under Co-host email.
- Pick a role: Collaborator (the default) or Admin.
- Choose what they can do: Can edit, Can invite, Can manage guests.
- Click Invite co-host.
A co-host you invite here can edit the itinerary and the event alongside you, scoped to whatever permissions you gave them.
Guest chat
Open Guest chat for one shared thread with everyone you've invited.
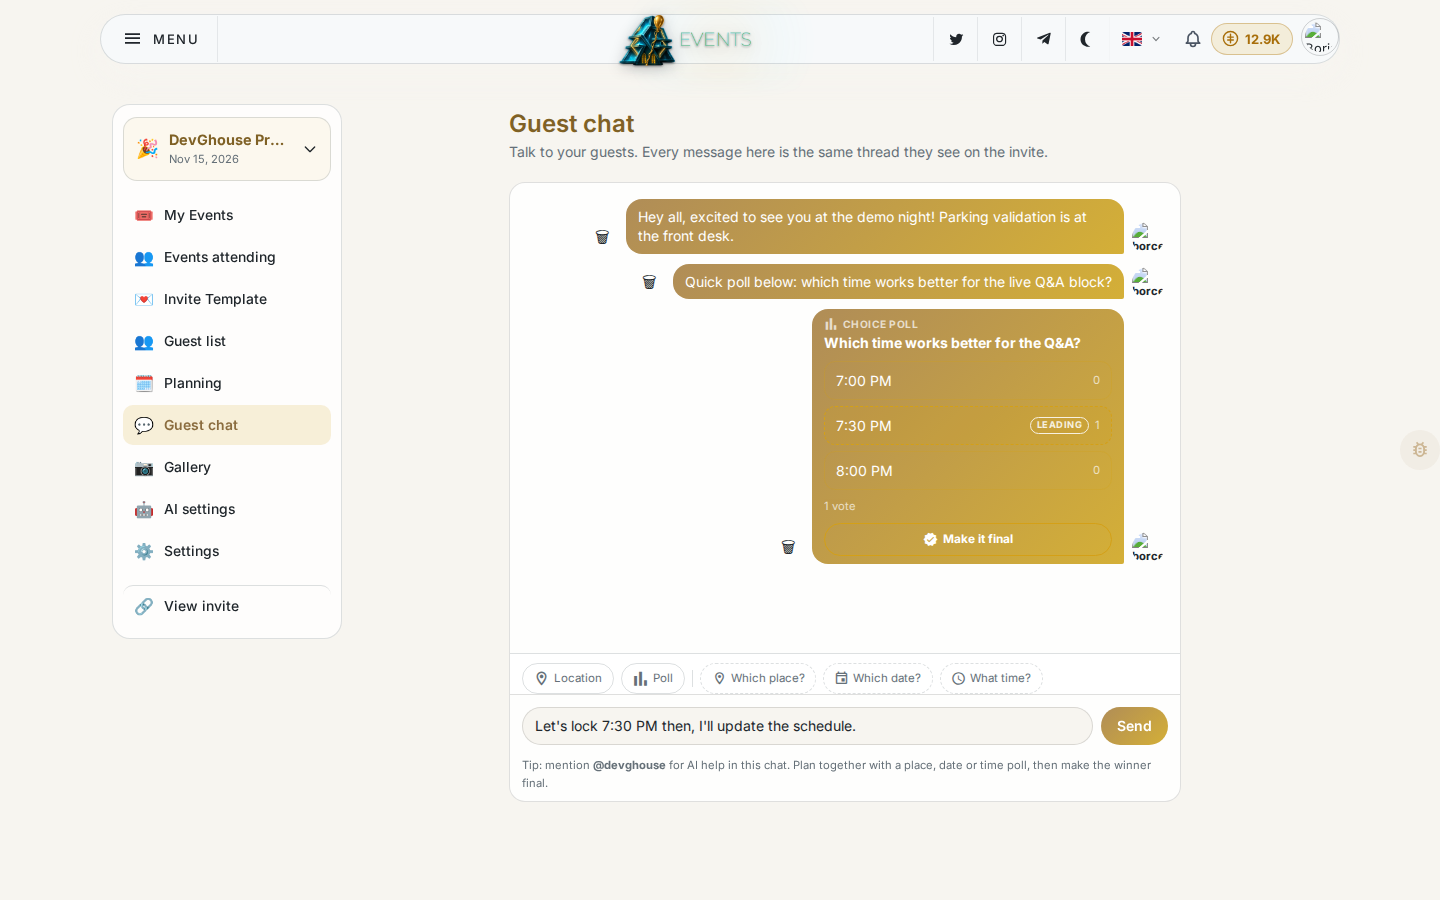
Type a message and click Send, or use the quick buttons above the message box to start a Location, Poll, Which place?, Which date? or What time? prompt. It's a quick way to settle a detail with the group instead of a dozen back-and-forth messages.
Mention @devghouse in the chat to bring in the AI assistant: it can read the conversation and help plan, for example suggesting where a break fits in the schedule. Guest chat is off by default; turn it on in Settings if you want it on your invite.