
Settings and scan history
Communication never scans more than you tell it to. Settings is where you turn monitoring on for a source and, just as importantly, narrow it down to the parts of your inbox that actually matter.
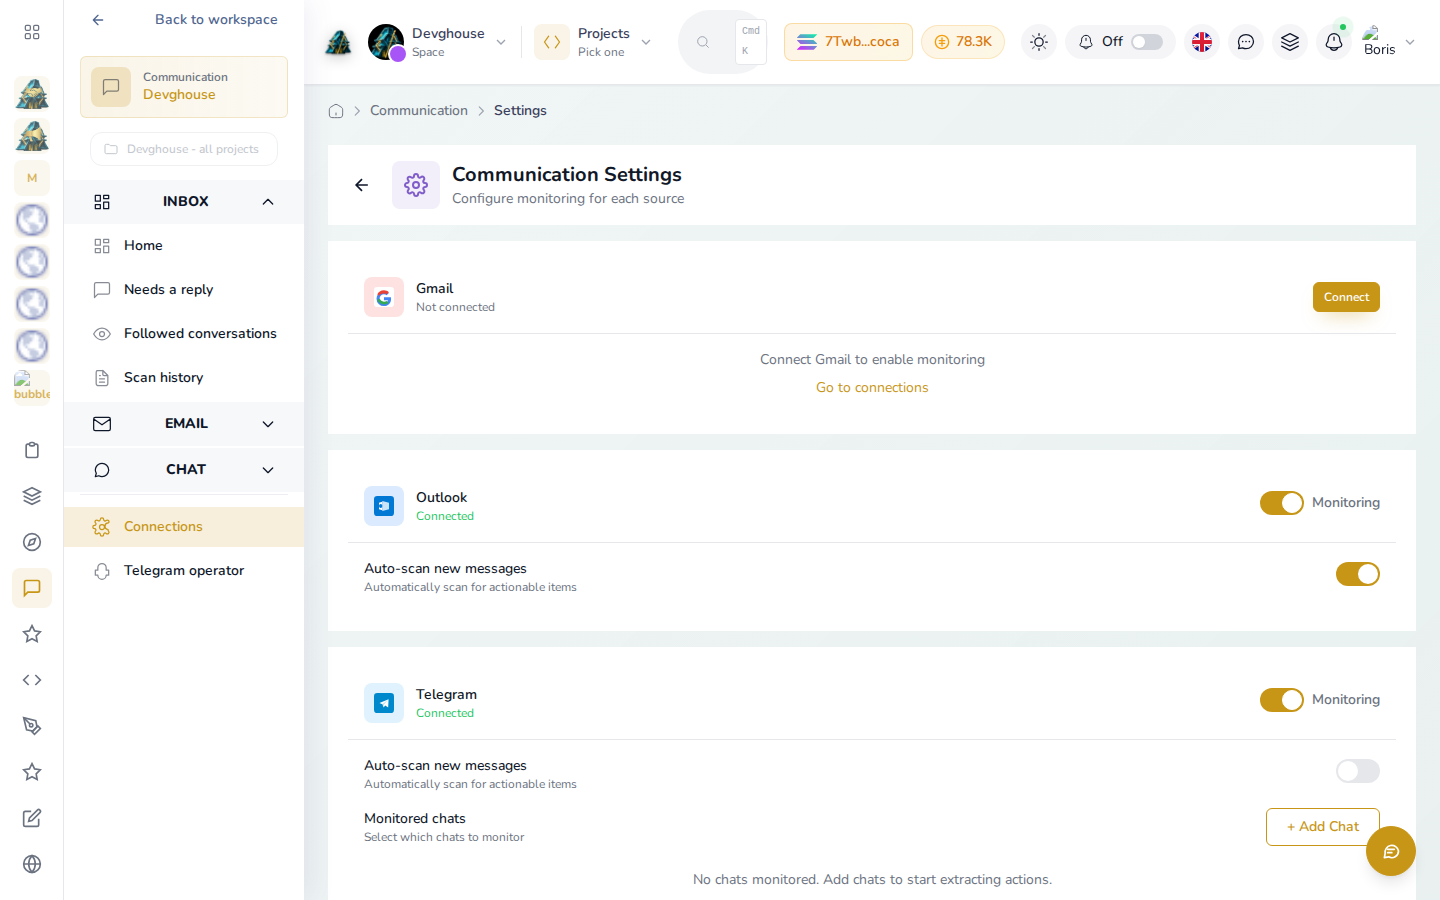
Turn on monitoring for a source
- Open Communication, then click Connections in the sidebar (or the gear icon on the Communication Center). Both open this same Communication Settings page.
- Each connected source (Gmail, Outlook, Telegram, IMAP) has its own card with a Monitoring toggle.
- Click the toggle to turn monitoring on. Outlook above shows it right after the click: the toggle is now colored and its knob sits to the right, and the "Auto-scan new messages" switch underneath follows the same on/off state.
- If a source isn't connected yet, its card links you to Go to connections instead.
Choose exactly what's watched
Turning monitoring on doesn't mean your whole inbox gets scanned. Pick specific items to include:
- On a source's card, choose what to add: a Gmail or Outlook label or folder, or a specific Telegram chat.
- Only items you add here are scanned for actions. Everything else (a personal newsletter, an unrelated folder) is left alone.
- Remove an item the same way, whenever it stops being relevant.
This is the same idea as a followed conversation, at the level of a whole label or chat rather than one thread. Use Settings for "always keep an eye on my Clients label"; use a followed conversation for "keep an eye on this one deal."
Scan history
Scan history, in the Communication sidebar, keeps a record of every scan: what it looked at, whether it found anything that needed a response, and how it was prioritized.
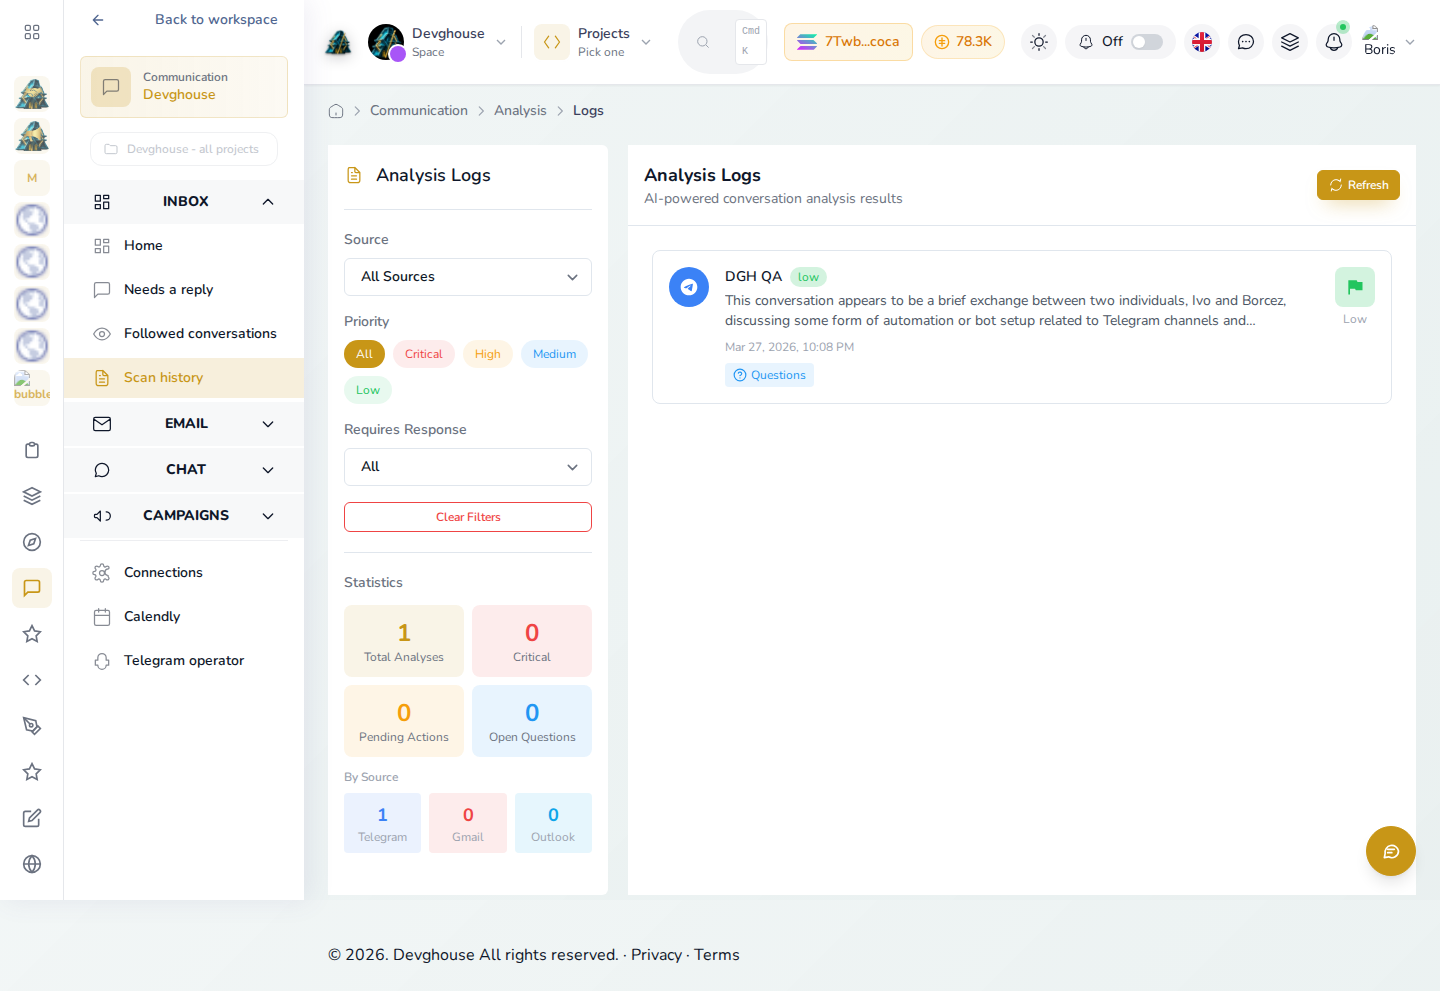
Use the filters on the left (source, priority, whether a response is required) to narrow the list down. The Statistics tiles and the By Source counts add up as scans run: the example above shows one completed Telegram analysis.